| BIKES | / | GEAR | / | DEALERS | / | DEMO | / | WHAT'S UP! | / | ABOUT | / | SUPPORT |
|
|
|
||


|
||||
|
||||
|
||||
|
||||
|
||||
|
||||
|
||||
|
|
||||
| BIKES | / | GEAR | / | DEALERS | / | DEMO | / | WHAT'S UP! | / | ABOUT | / | SUPPORT |
|
|
|
||
|
||||
|
||||
|
||||
|
||||
|
||||
|
||||
|
||||
|
|
||||


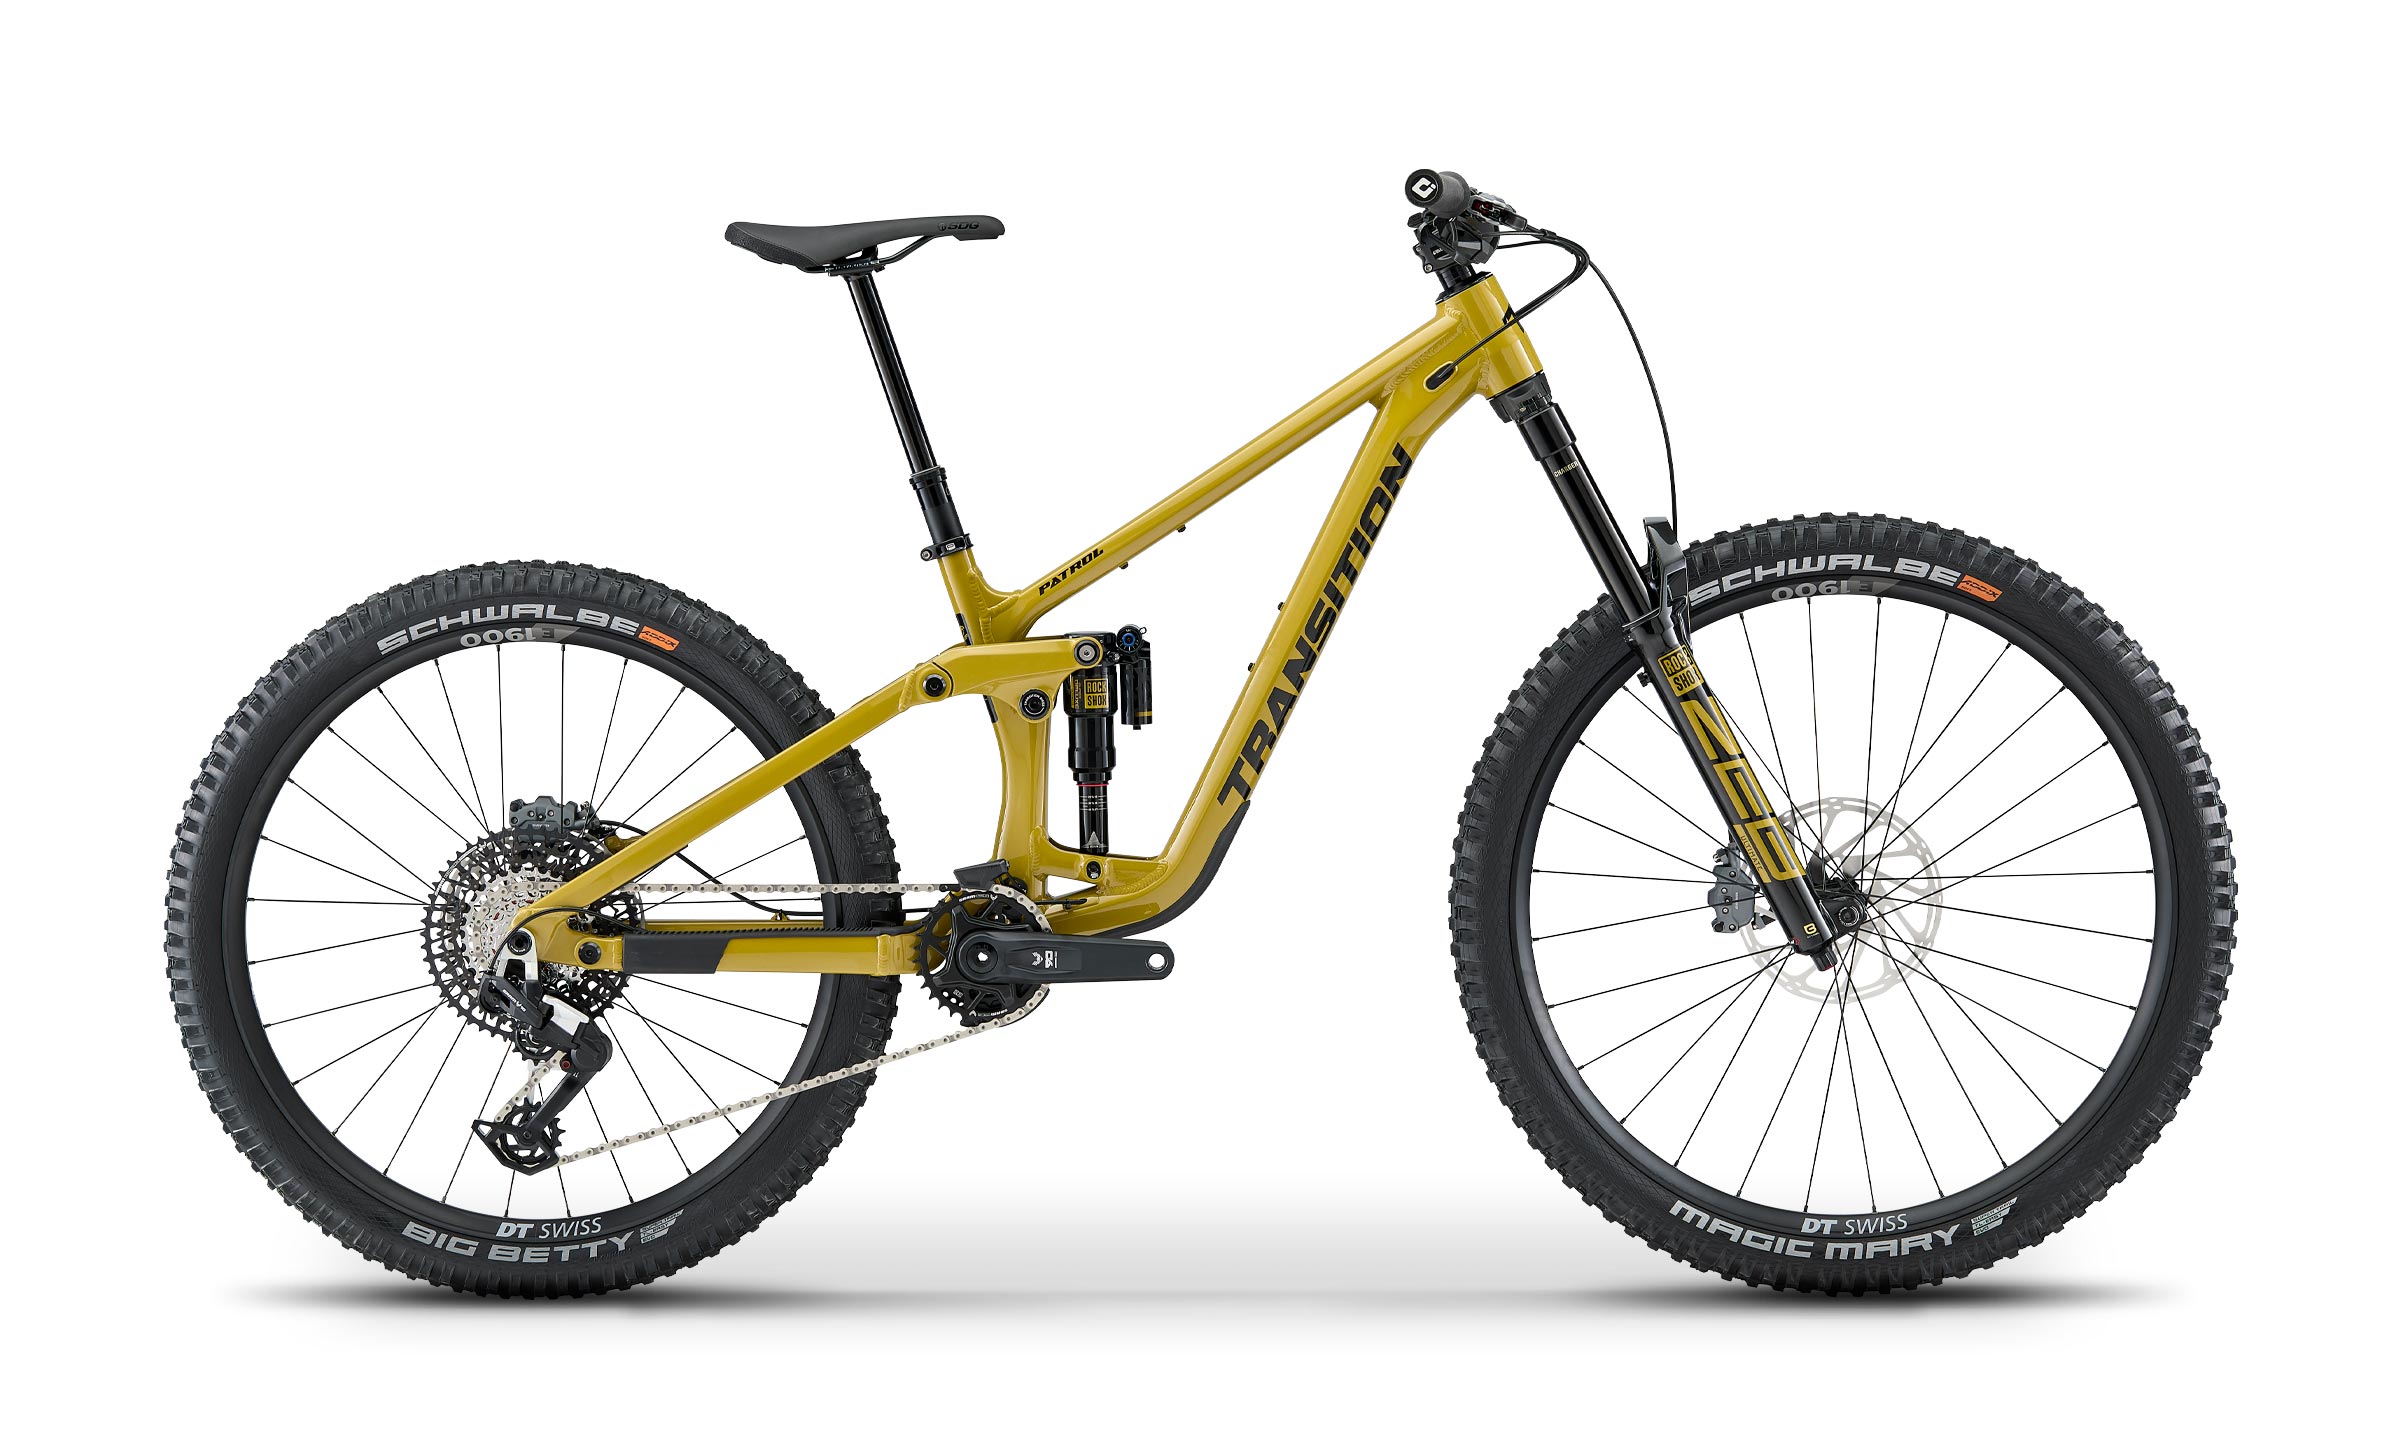
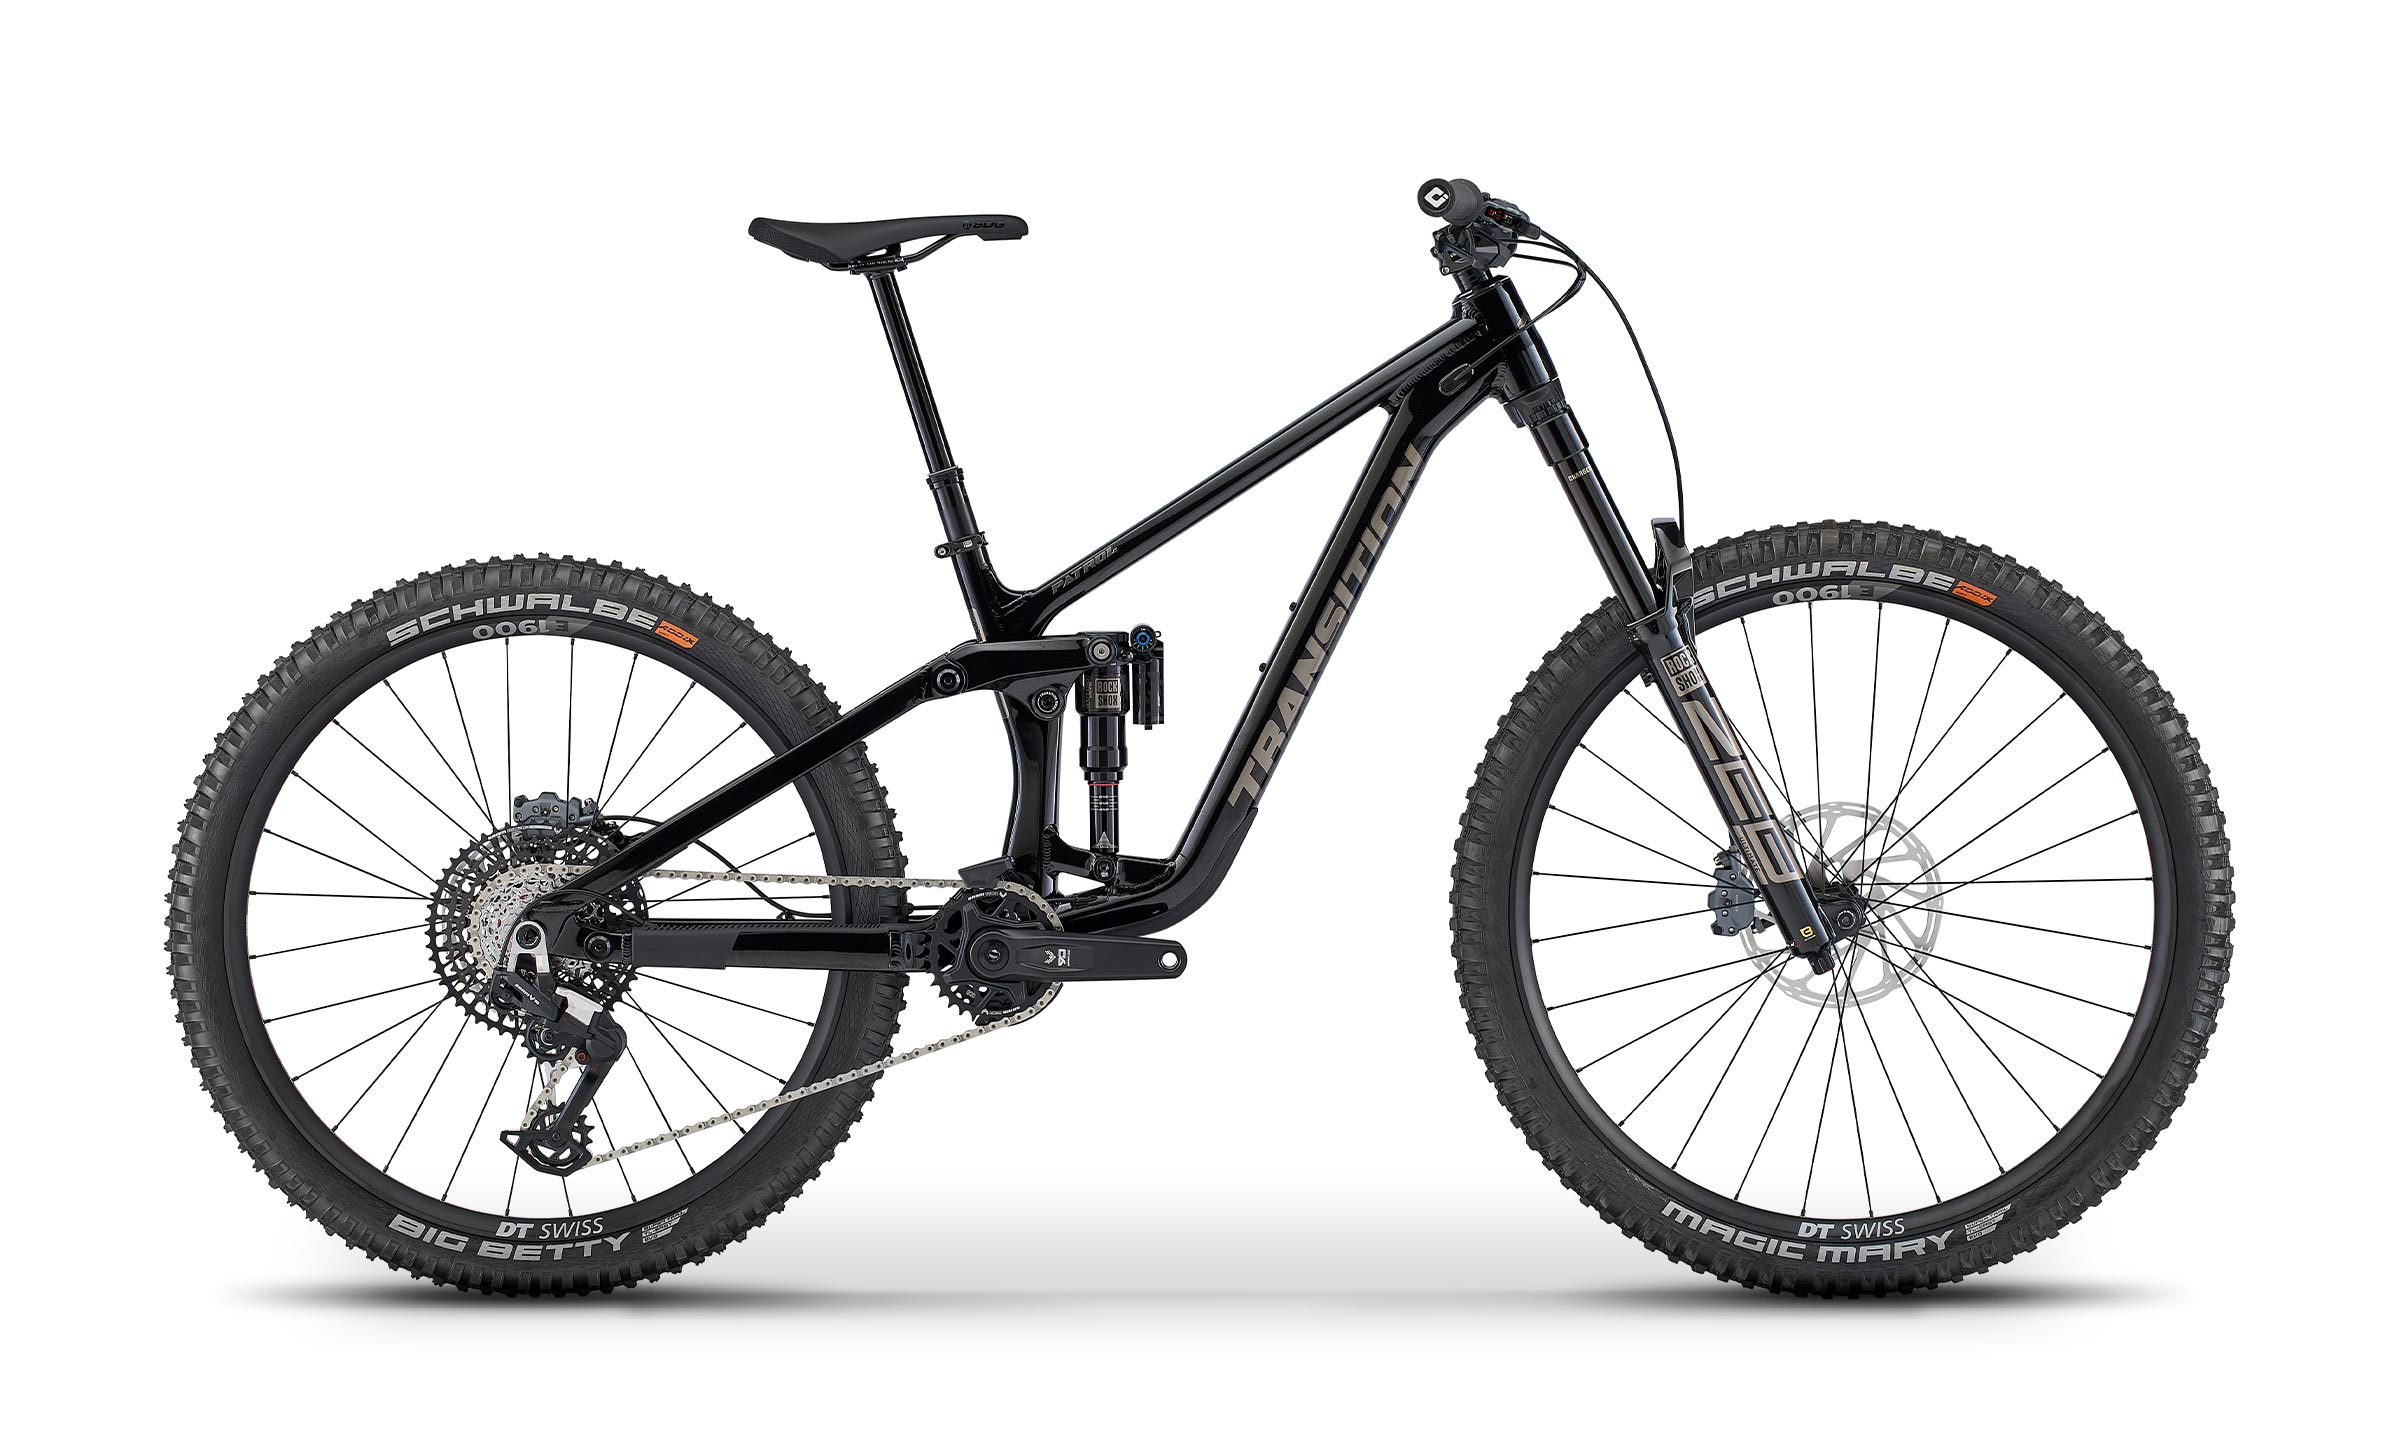
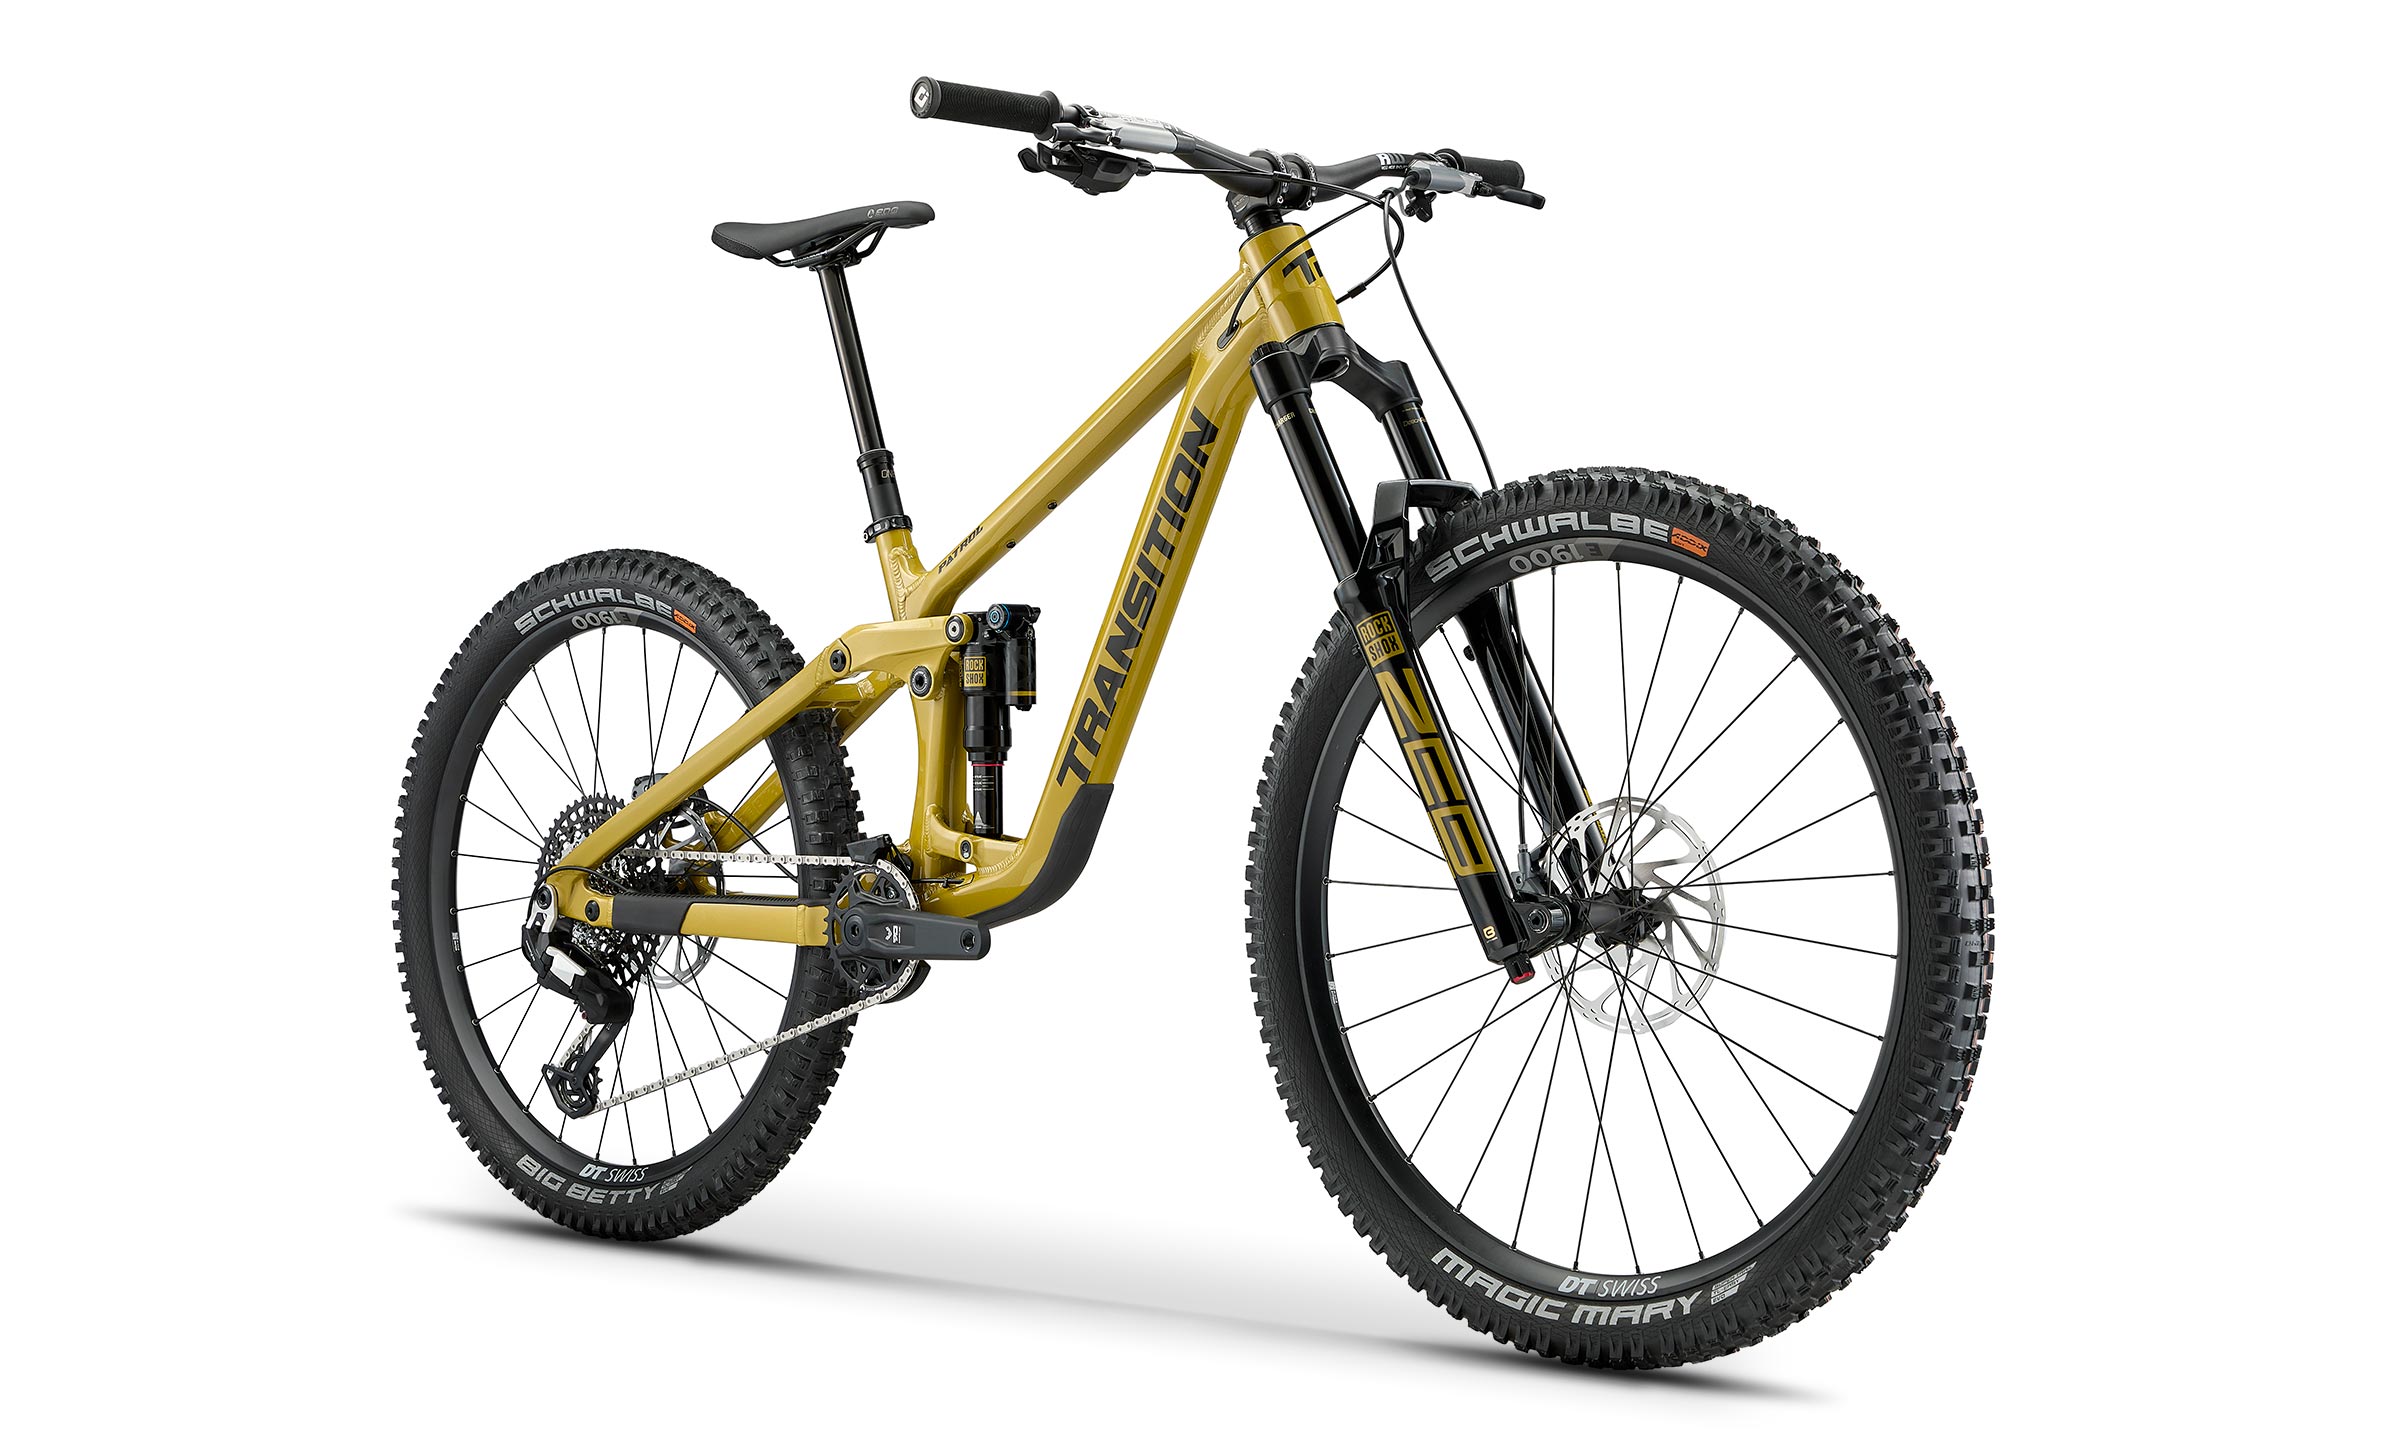


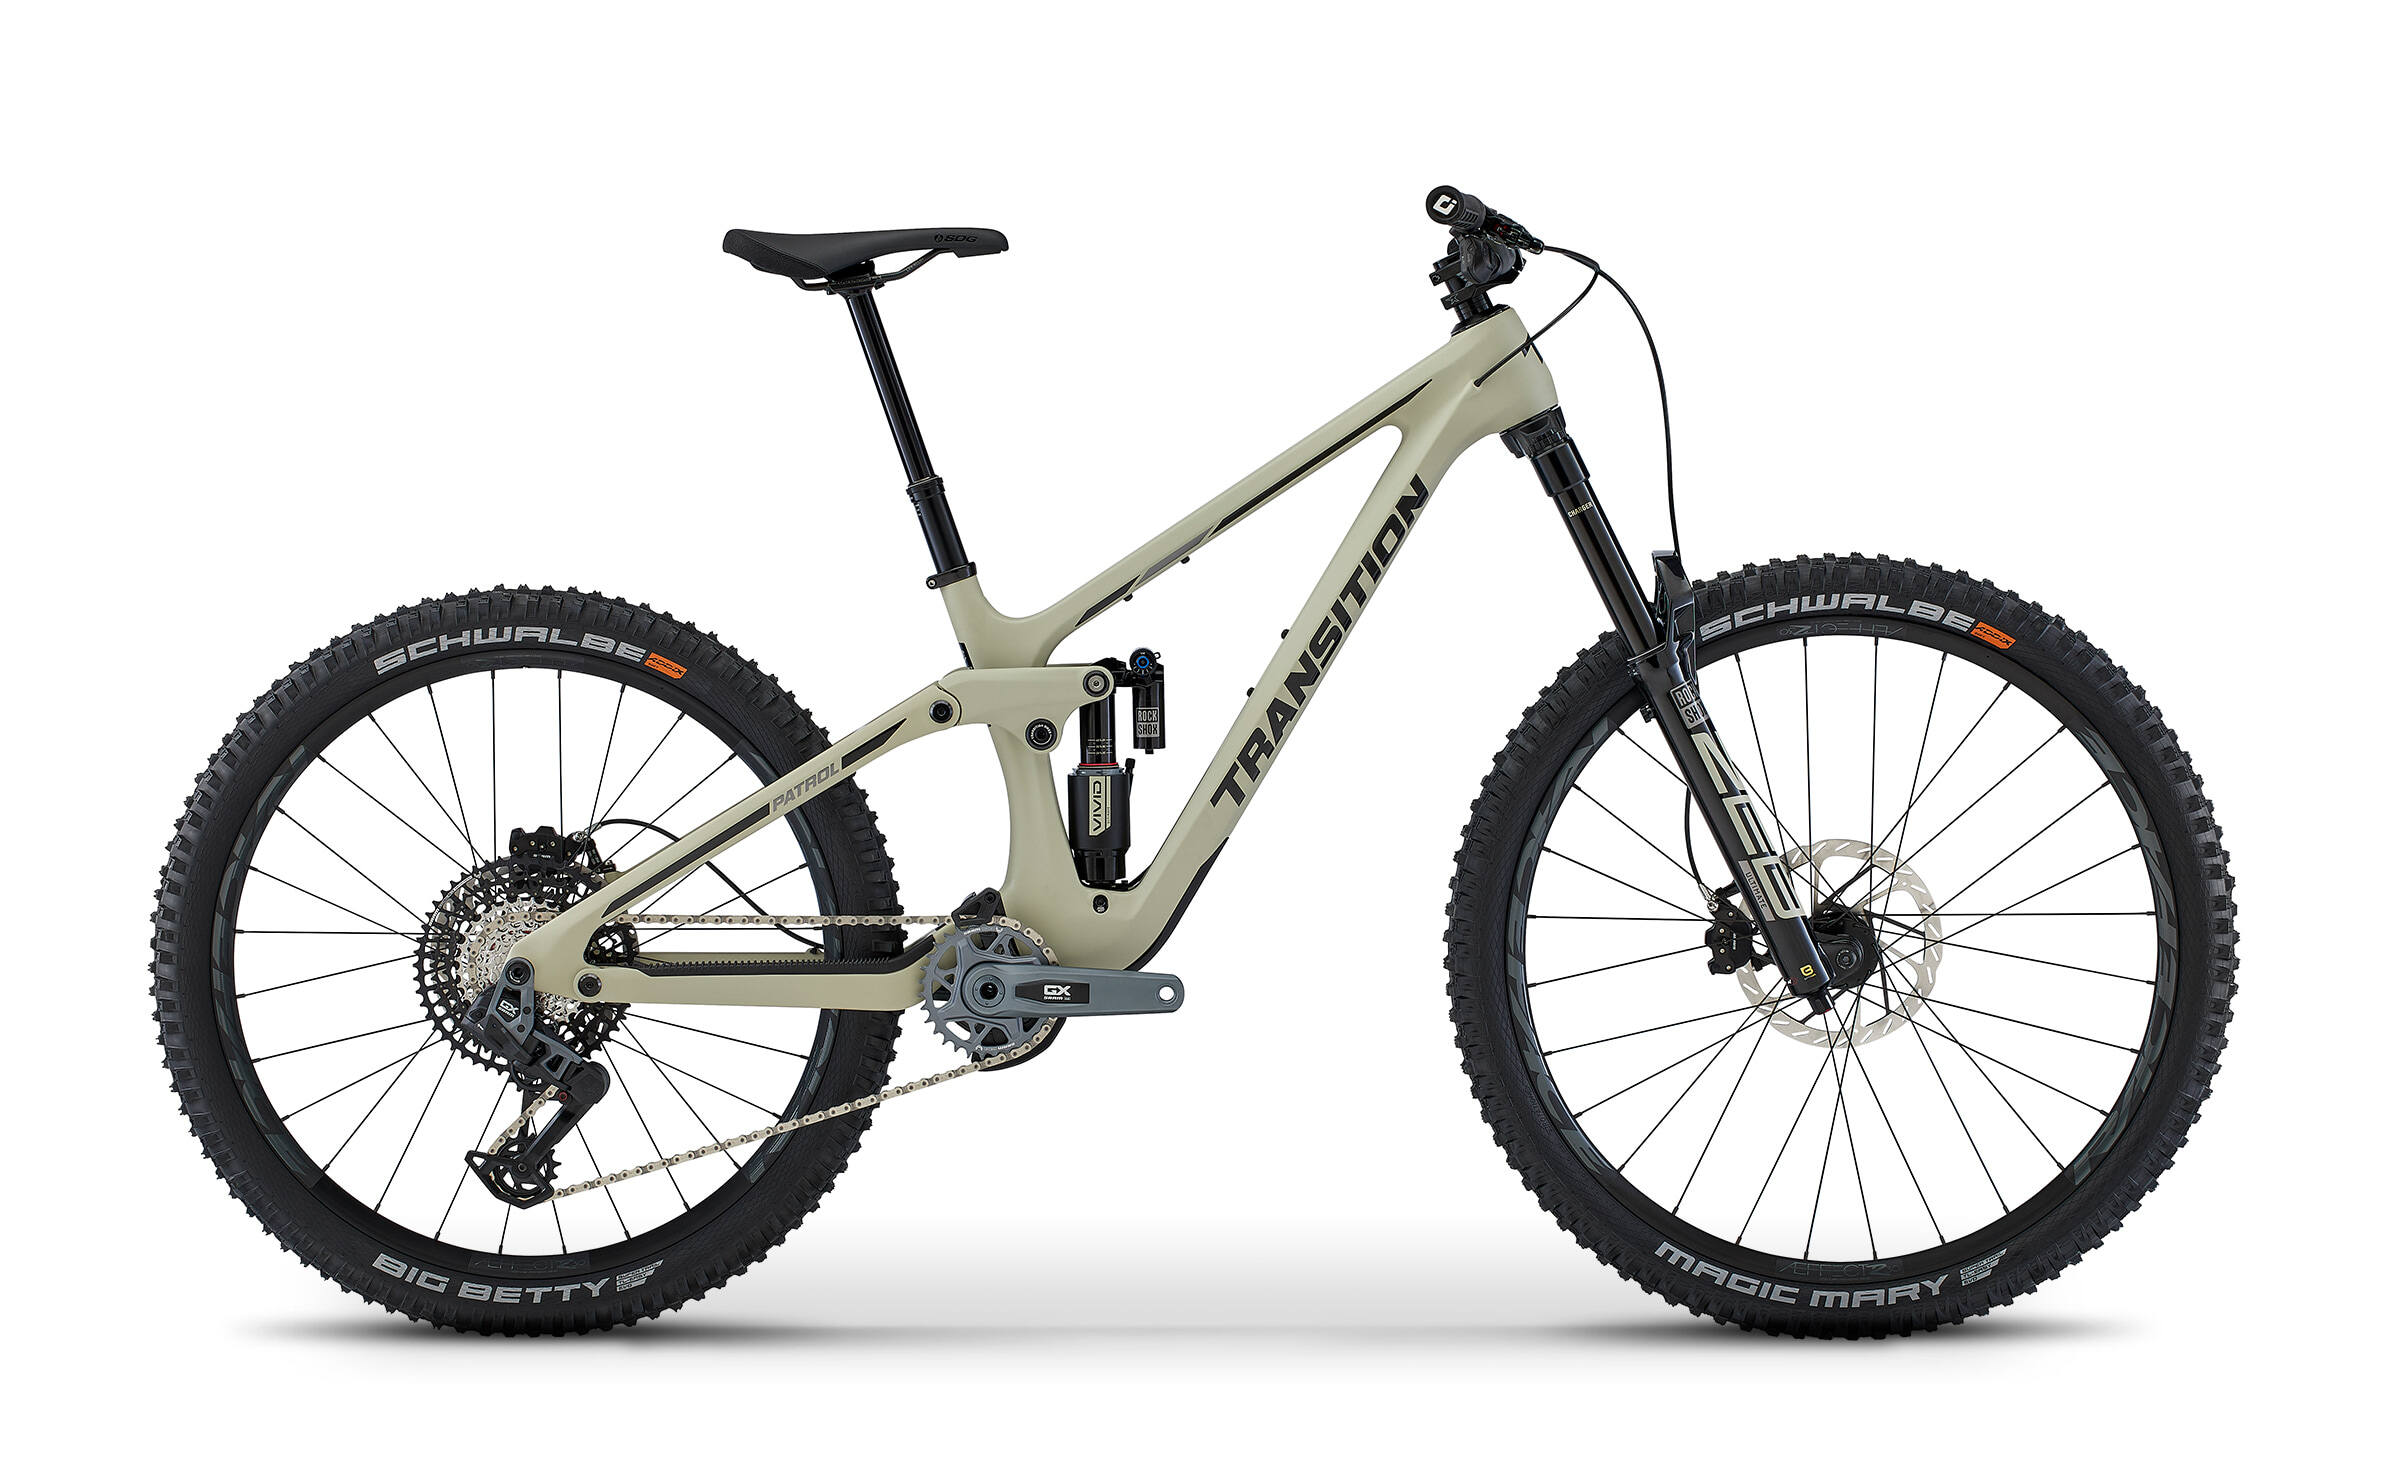
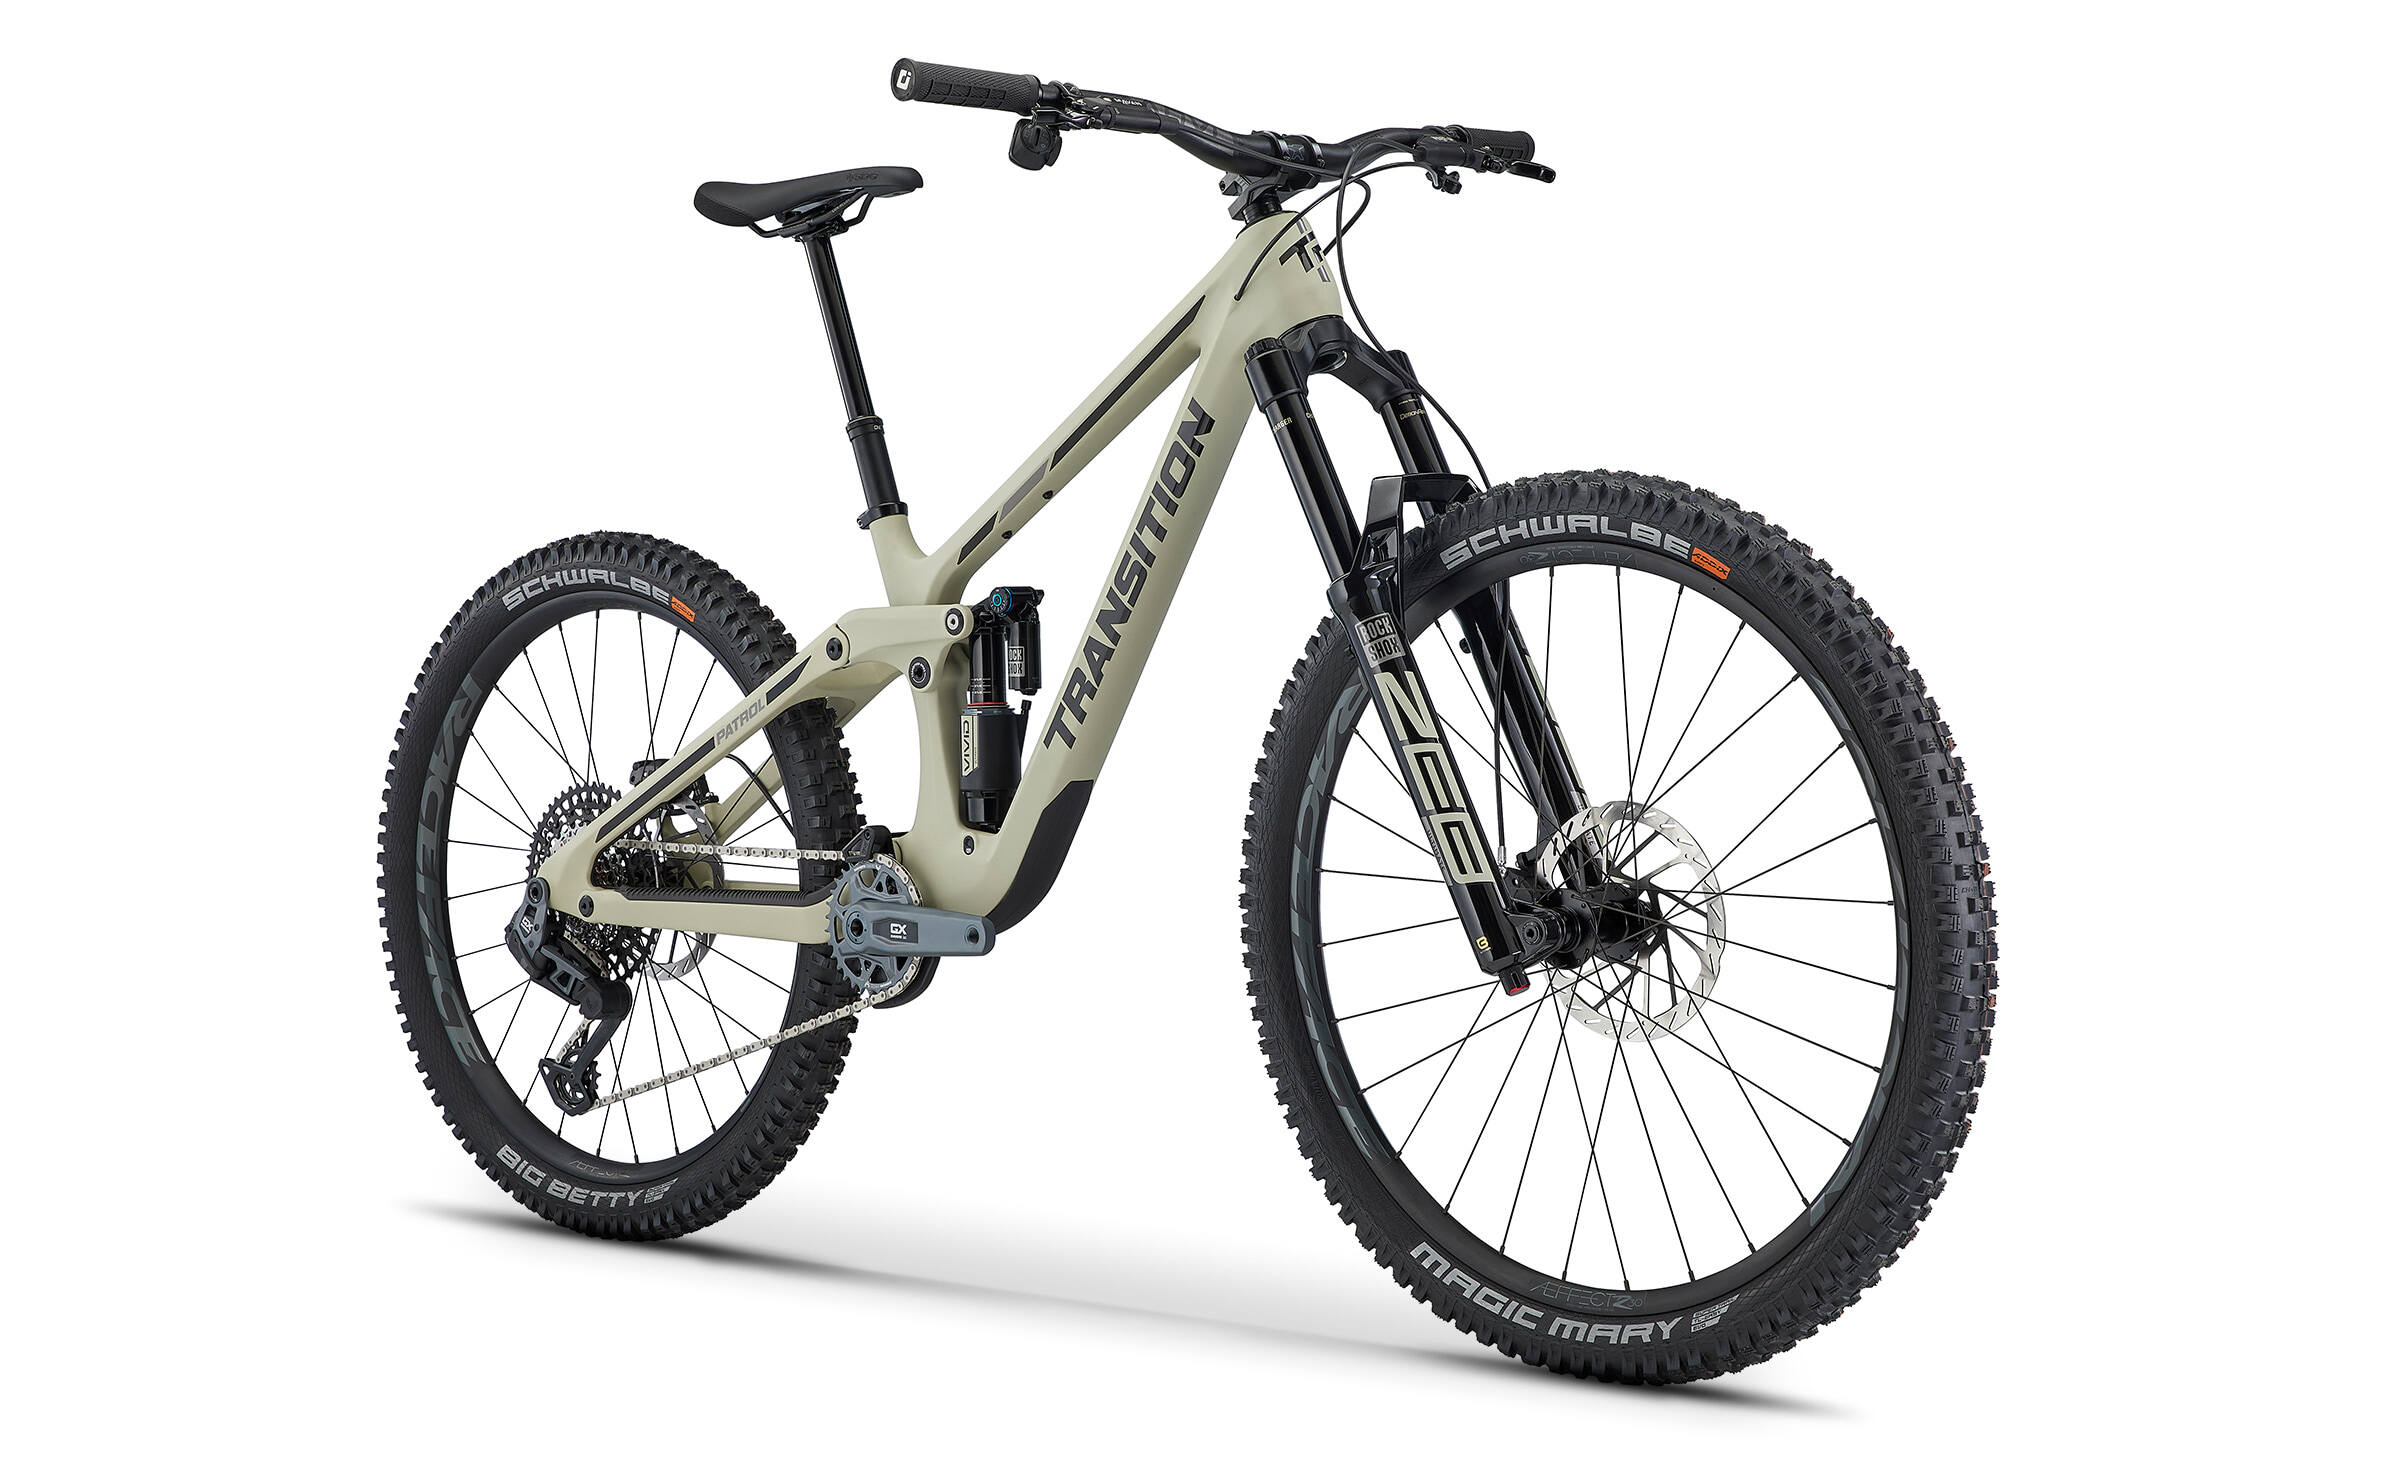
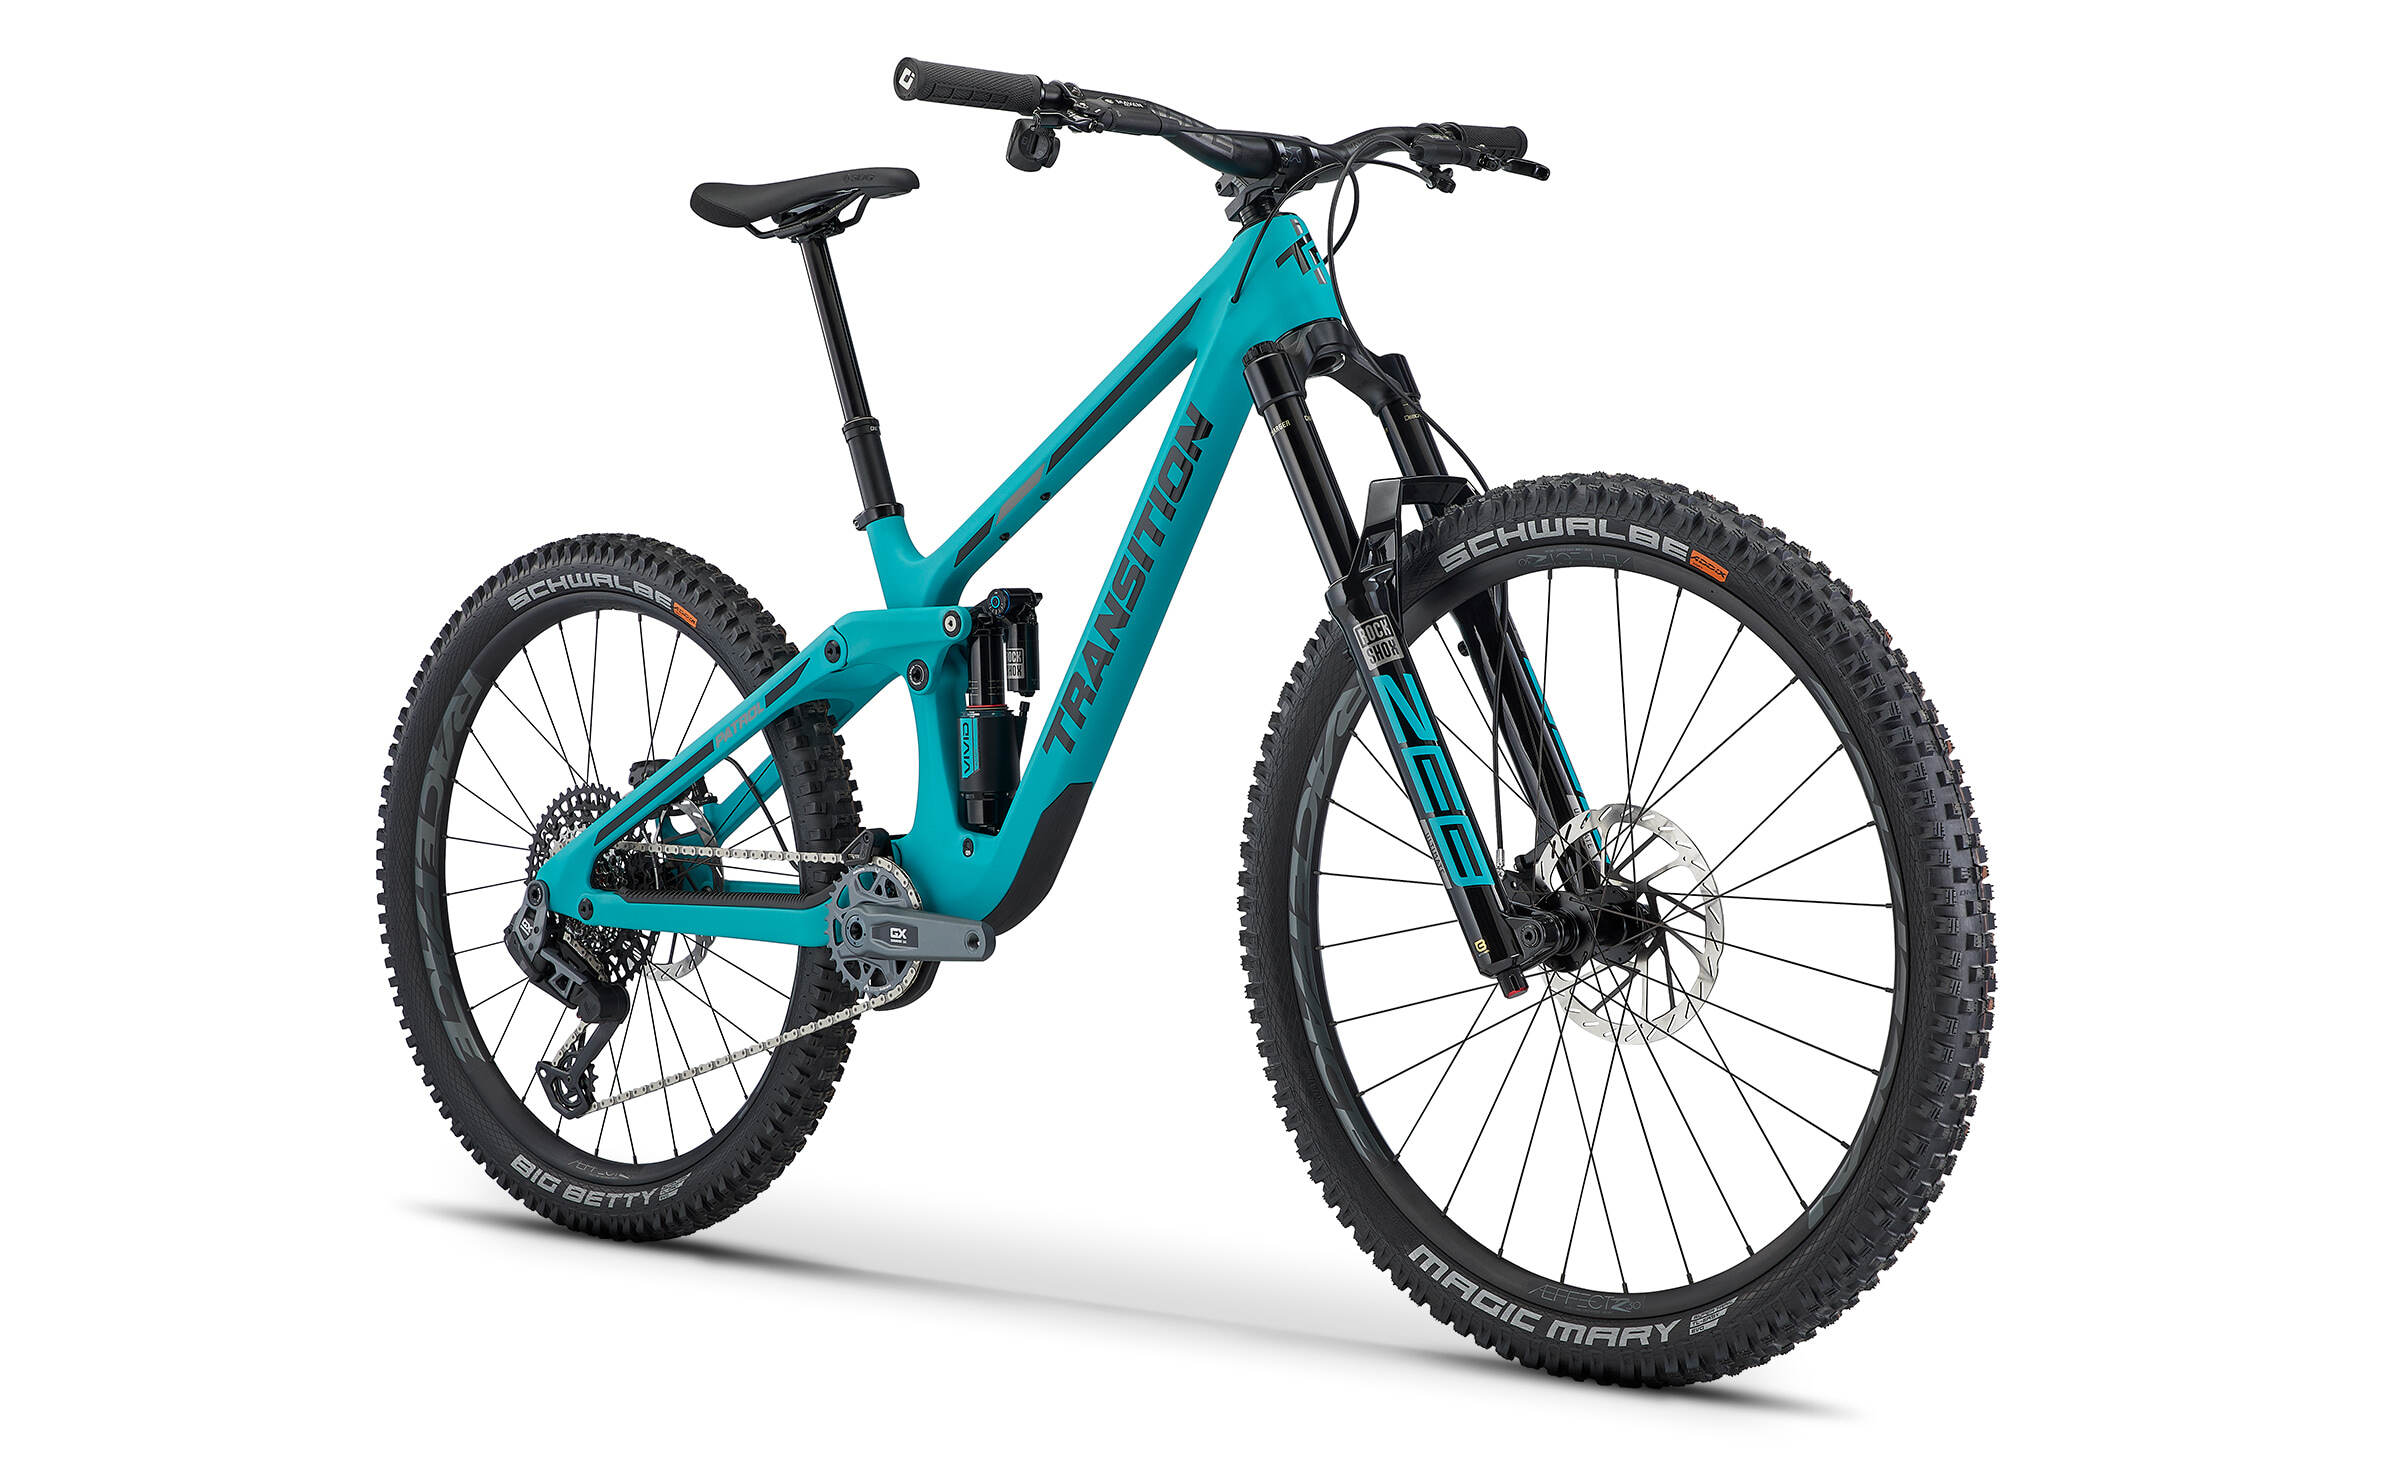
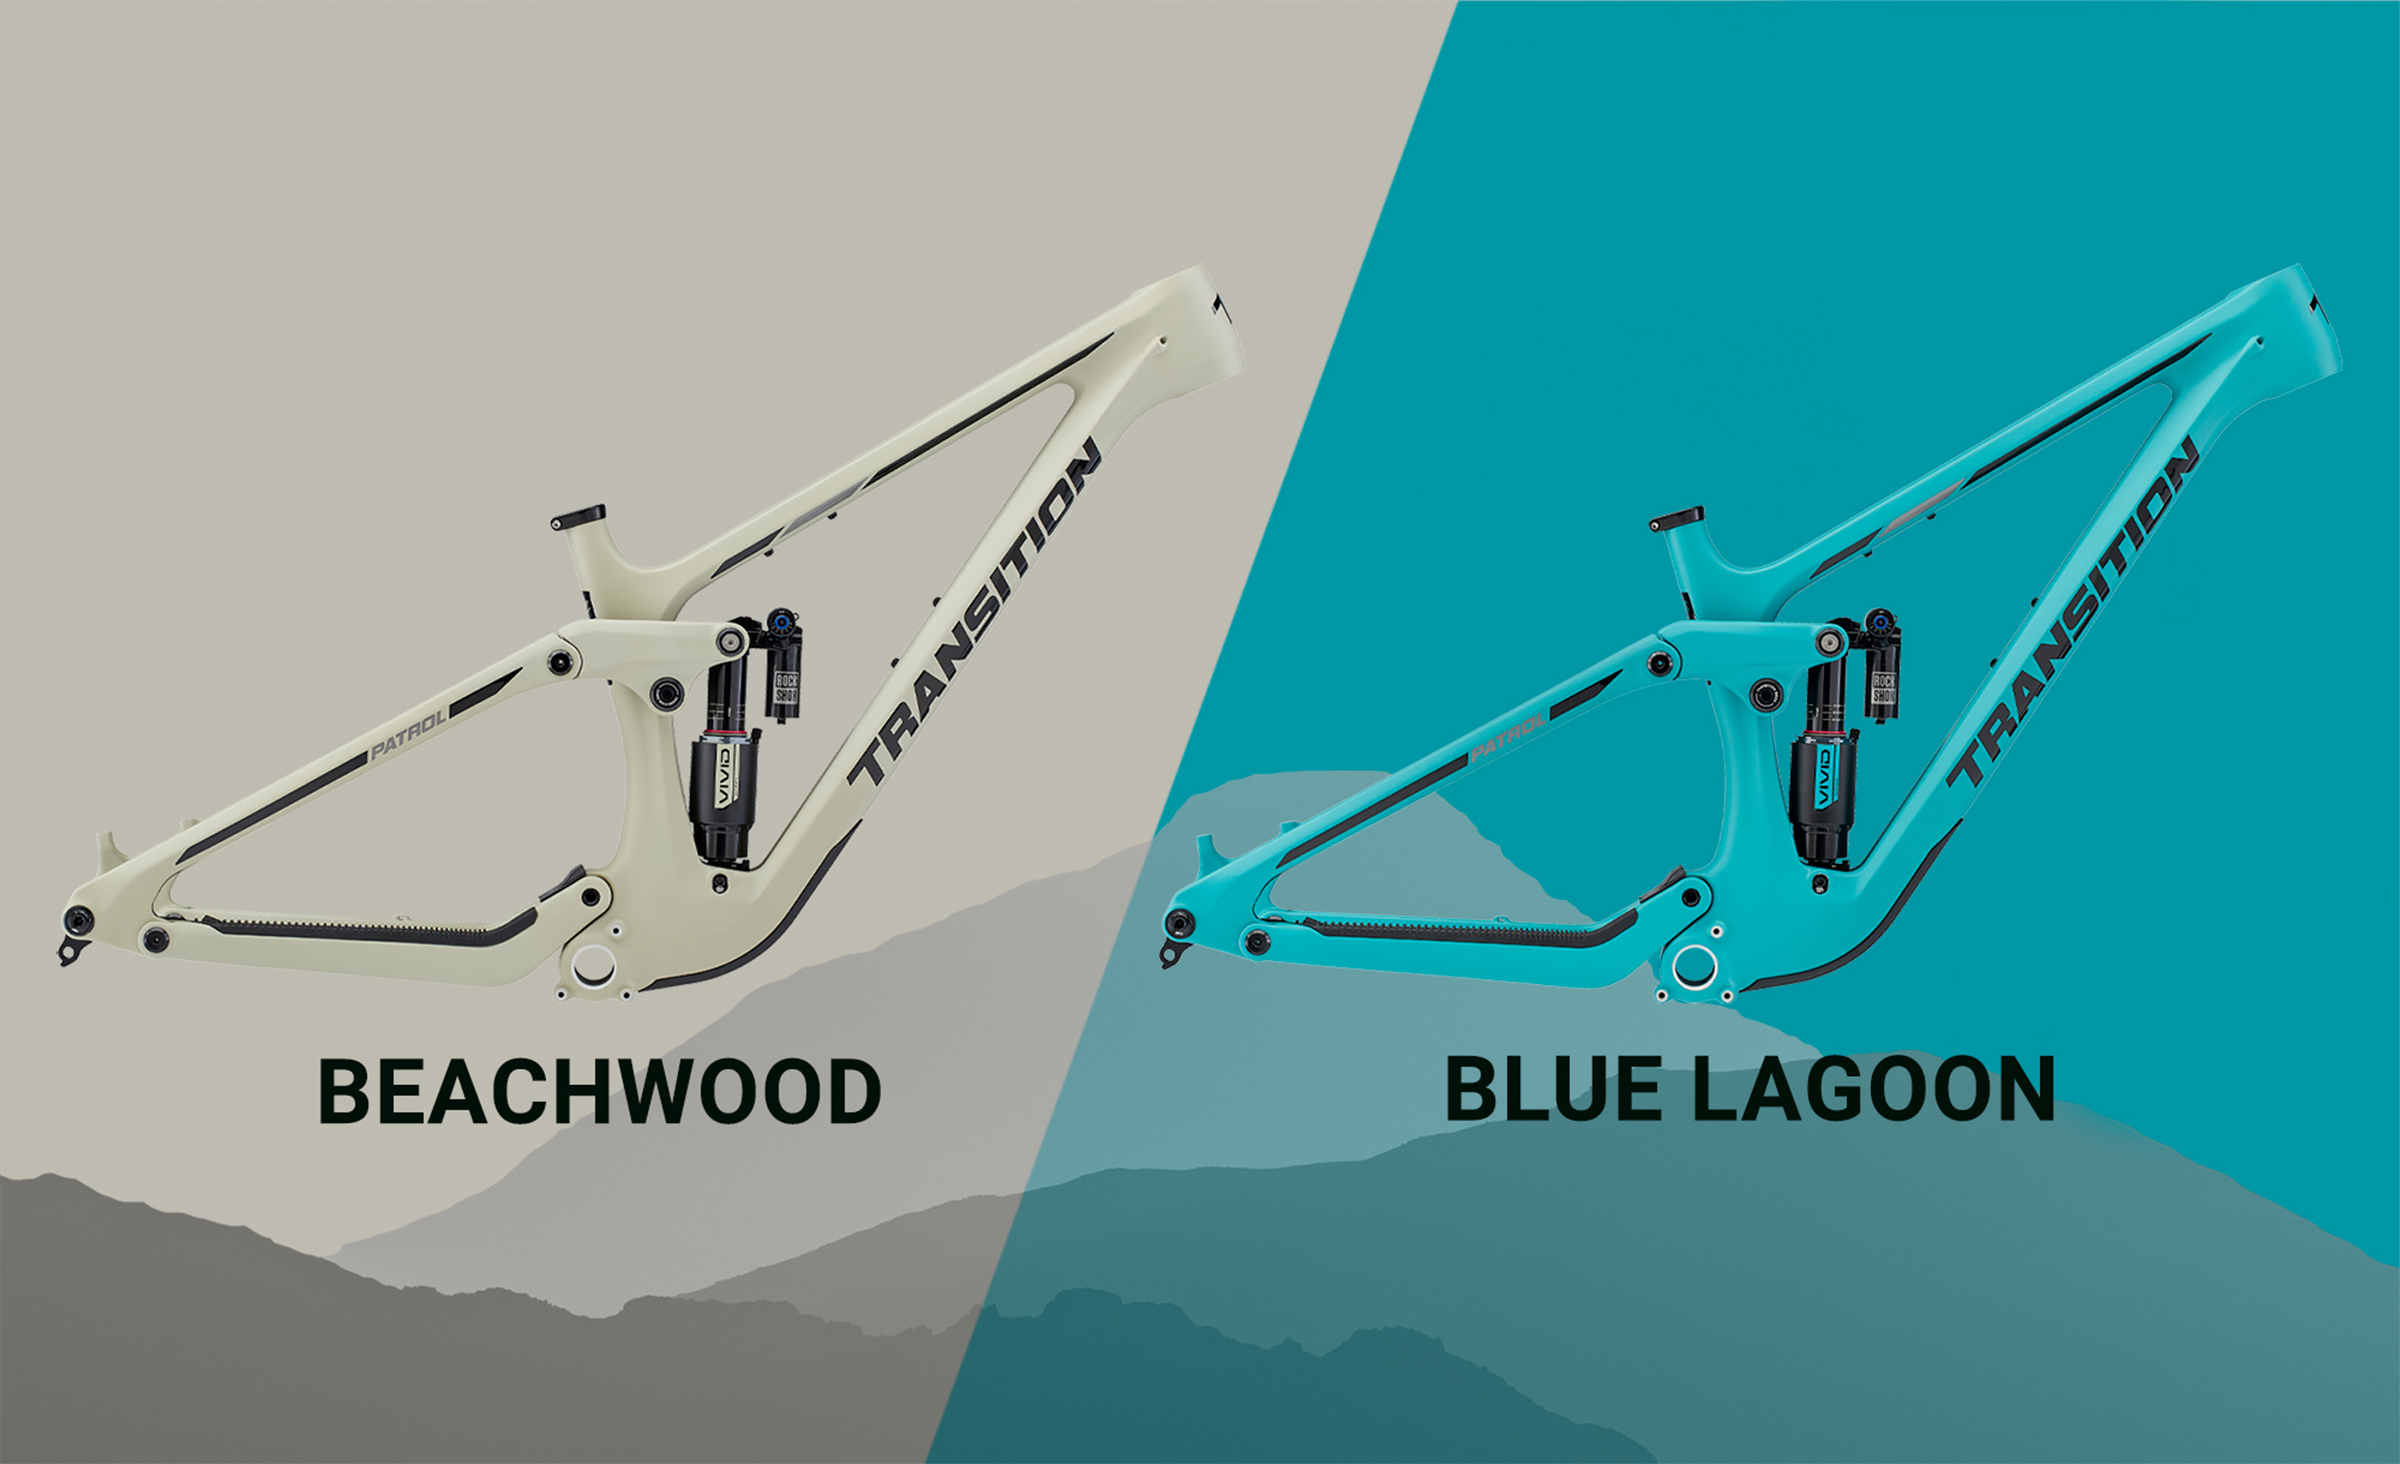

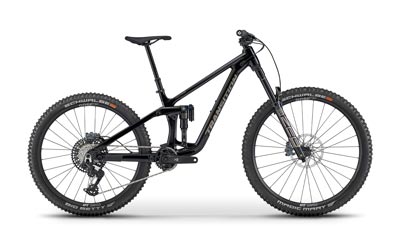
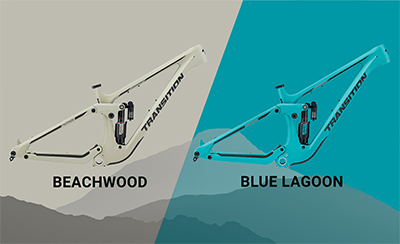
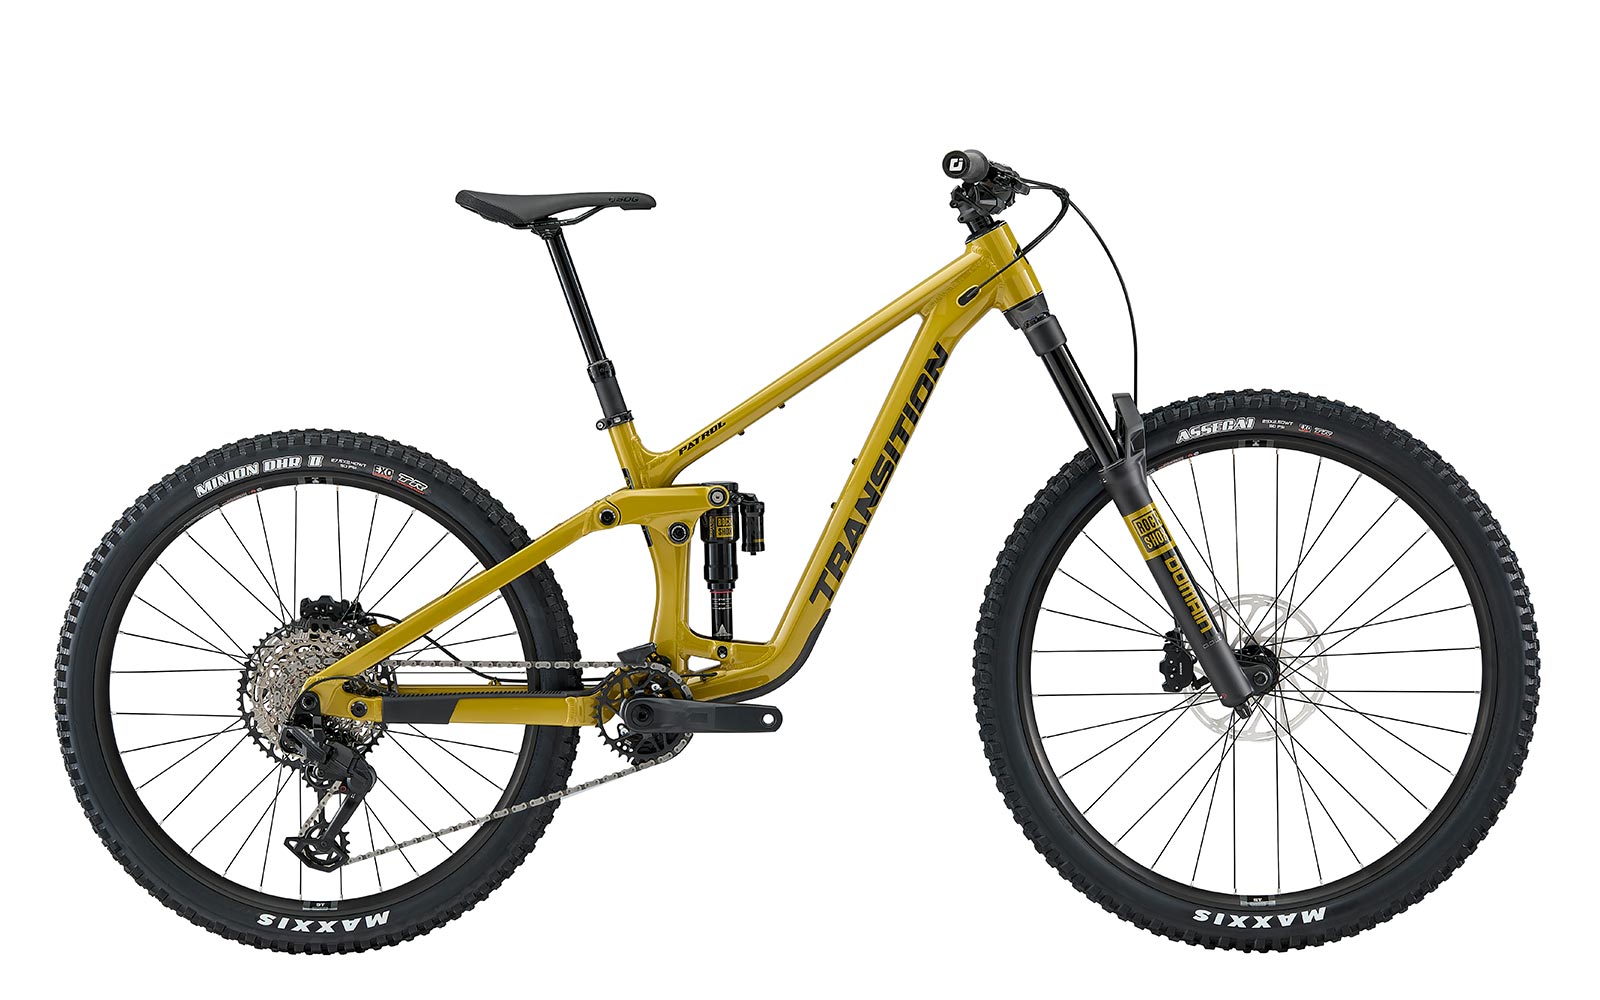
 BEACHWOOD BEACHWOOD
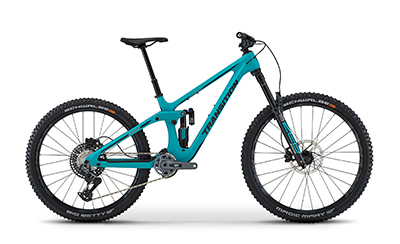
 BLUE LAGOON BLUE LAGOON
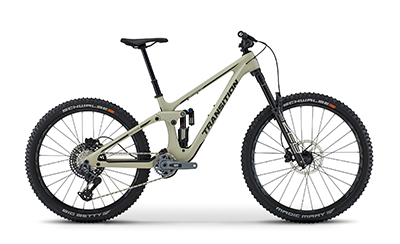
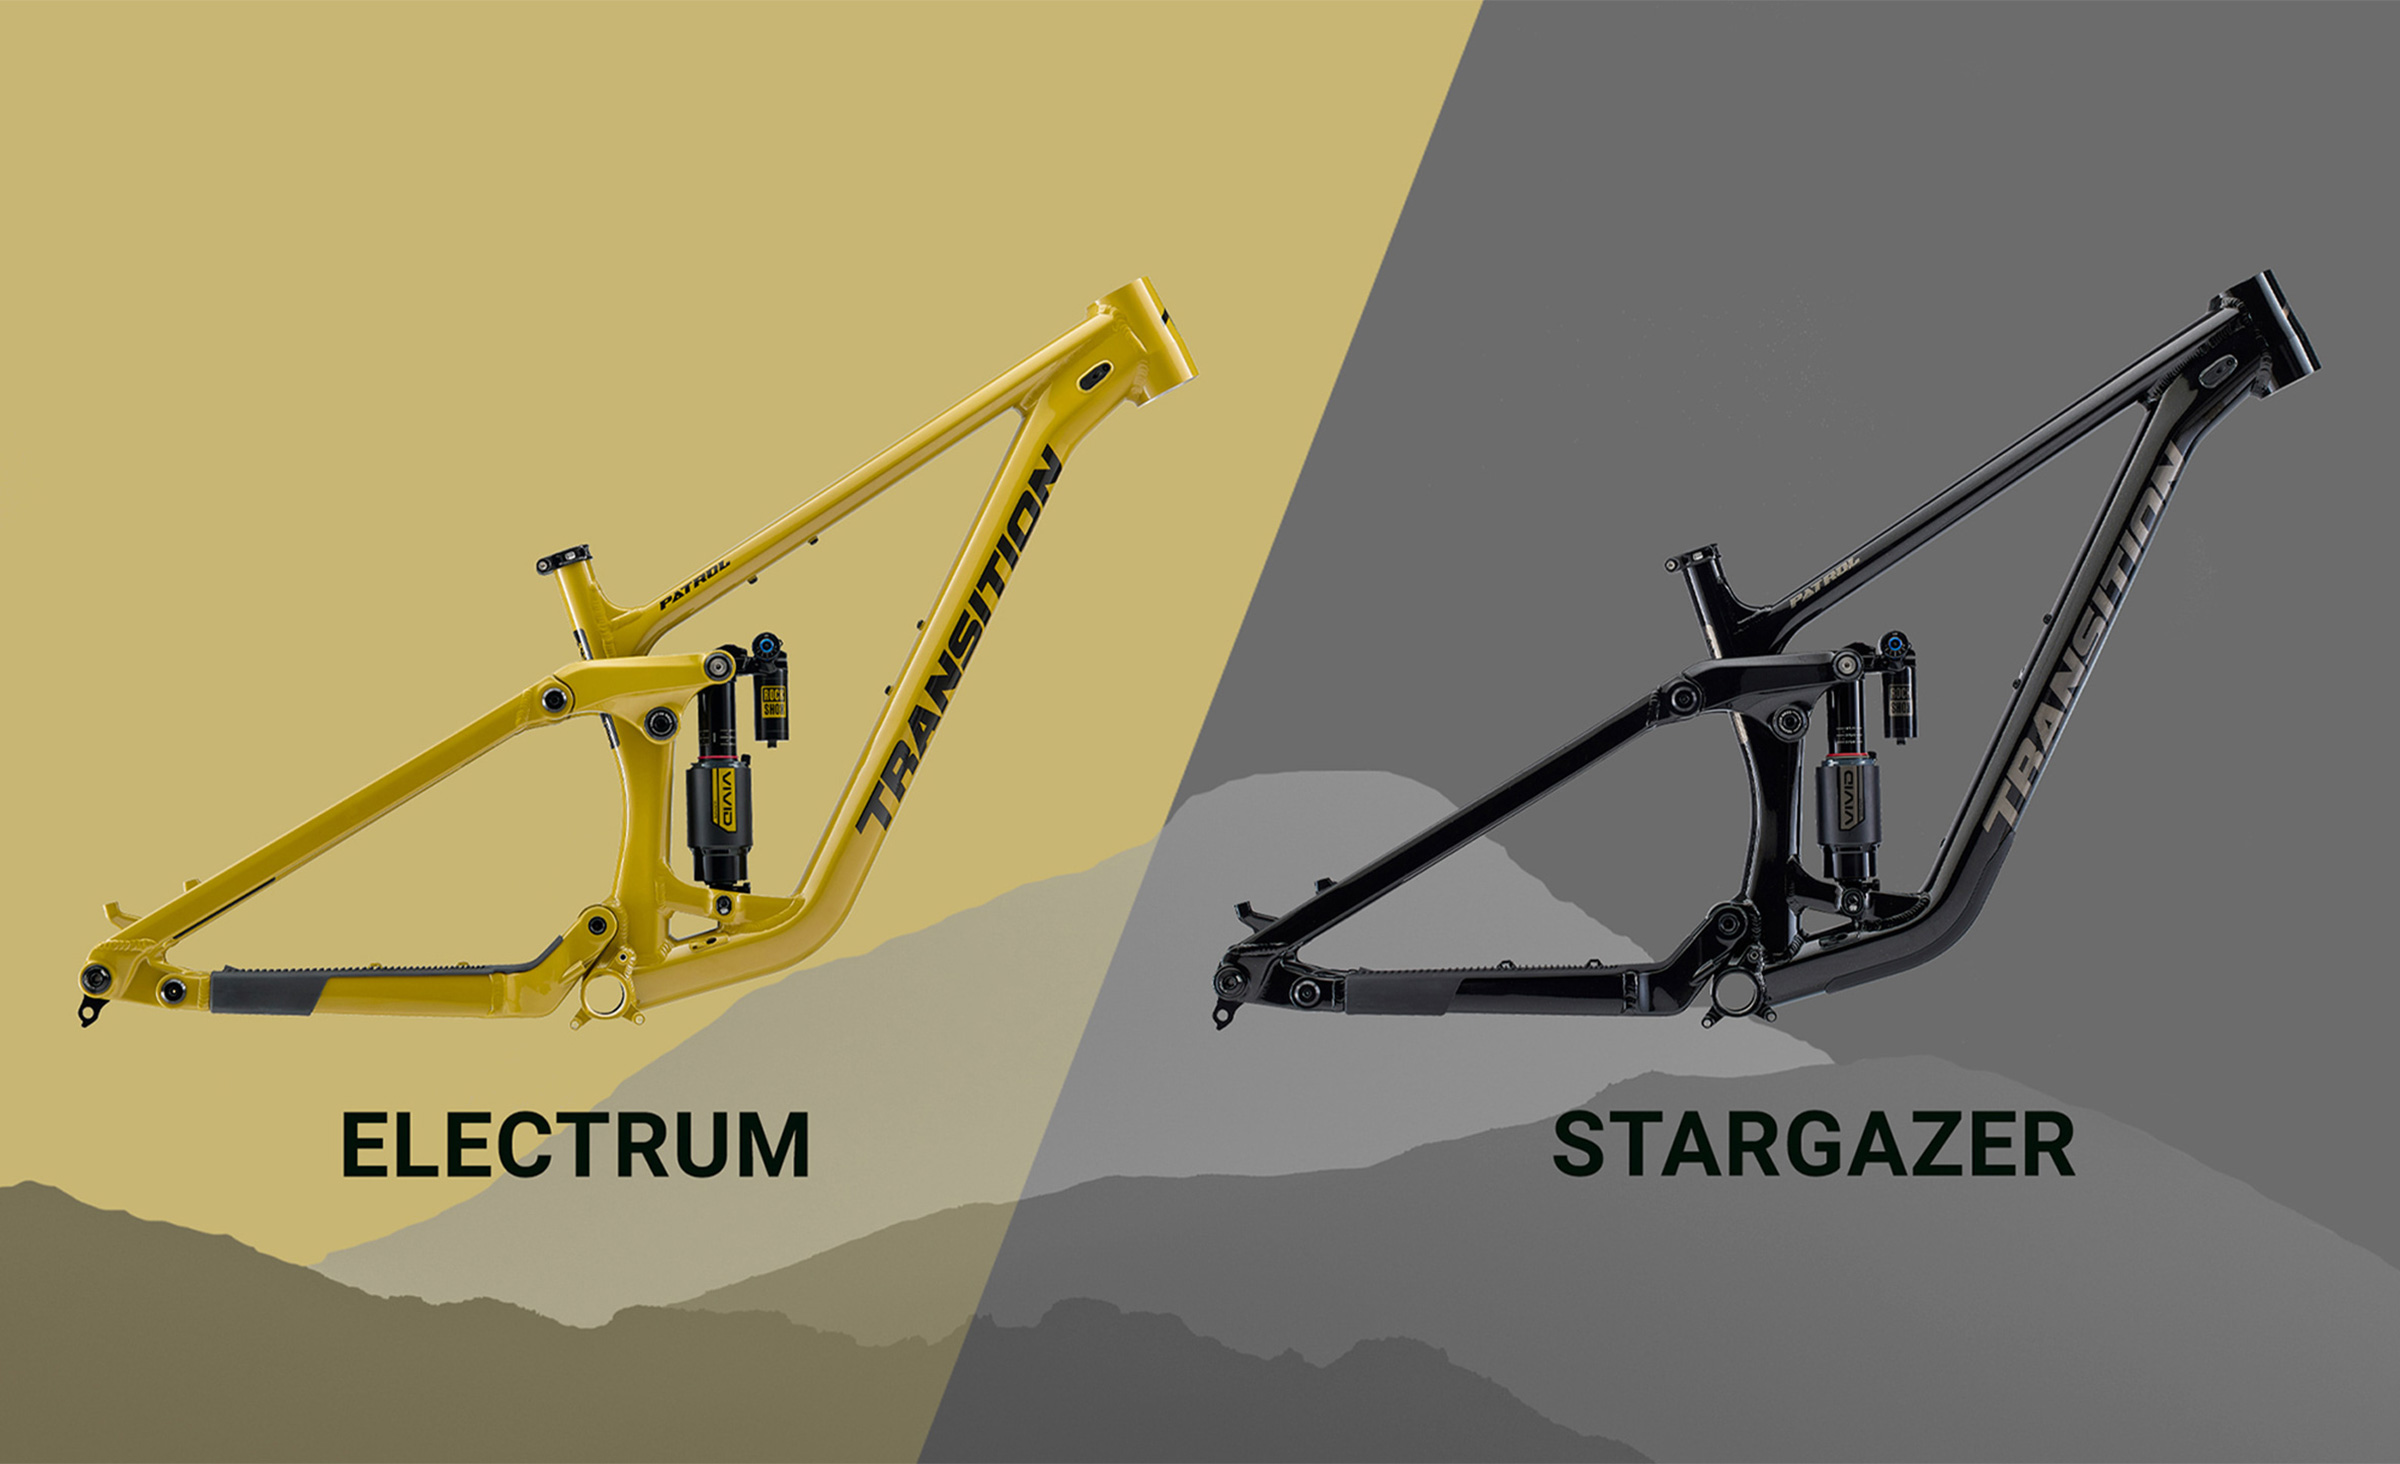
 ELECTRUM ELECTRUM
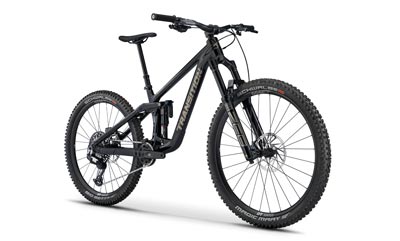
 STARGAZER STARGAZER
|


 $5,399 USD
 $5,999 USD

| + More | + More | + More | + More | + More | + More | |||||||||||||||||||||||||
| PRICE | $3,699 USD | $4,999 USD | $5,999 $5,399 USD |
$6,999 $5,999 USD |
$2,399 USD | $3,499 USD | ||||||||||||||||||||||||
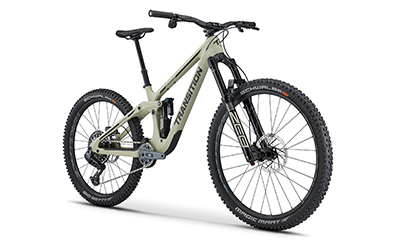
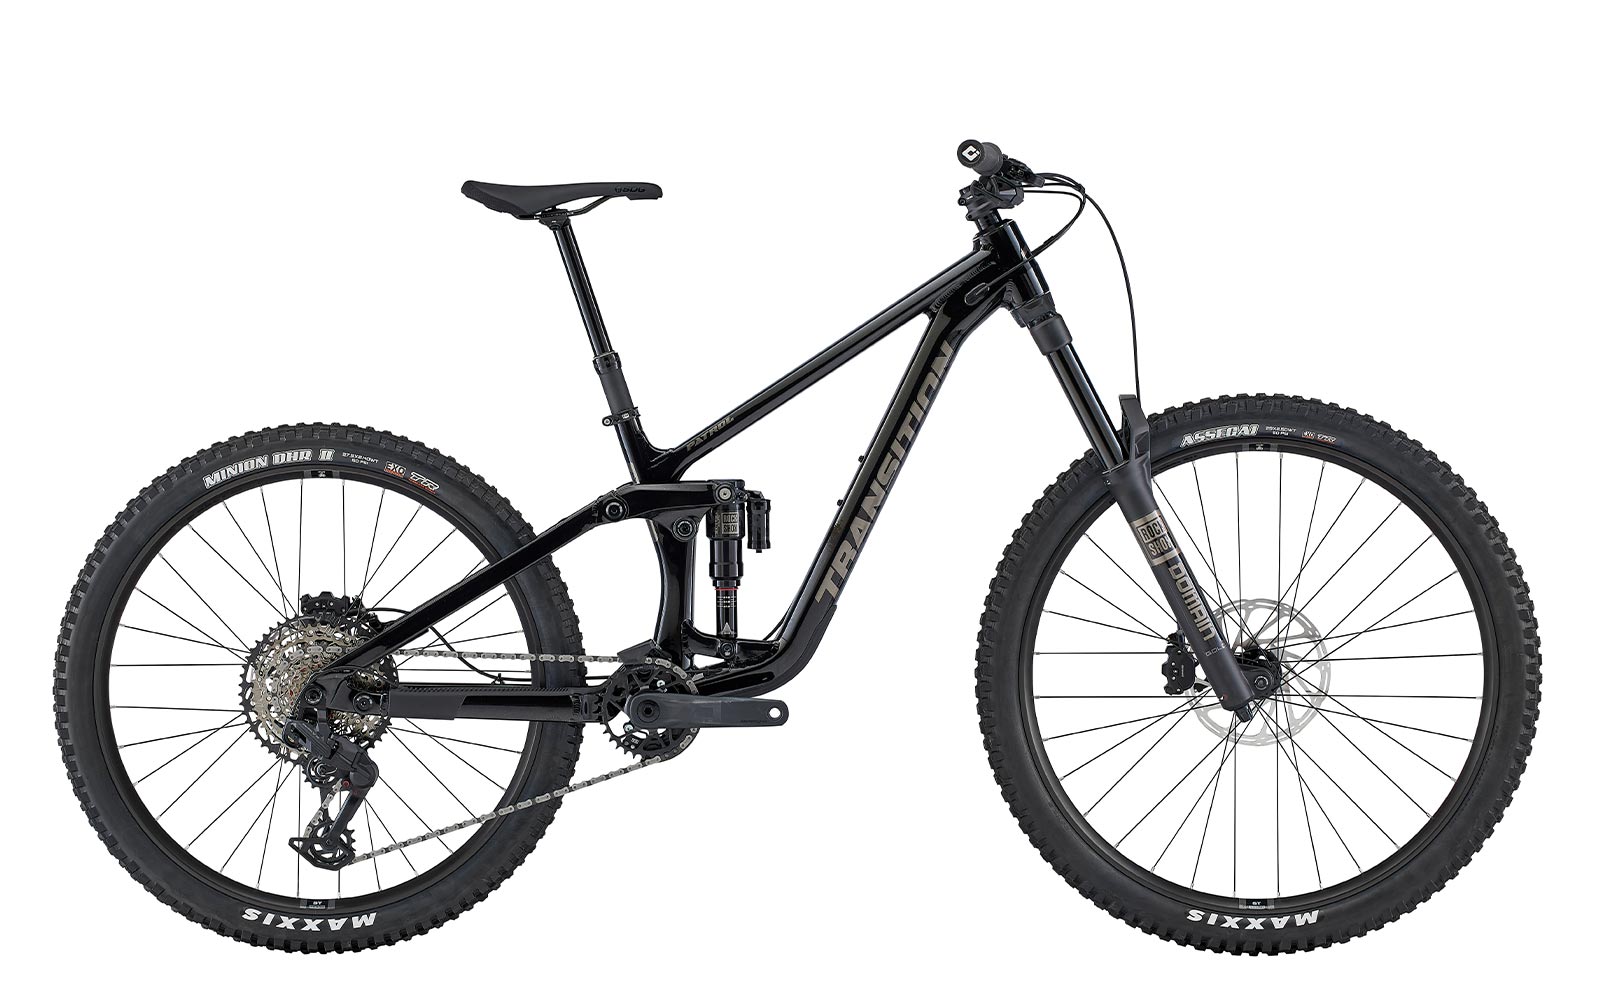
| FRAME | Patrol Alloy 160mm | Patrol Alloy 160mm | Patrol Carbon 160mm | Patrol Carbon 160mm | Patrol Alloy 160mm | Patrol Carbon 160mm | ||||||||||||||||||||||||
| WHEEL SIZE | Mixed | Mixed | Mixed | Mixed | Mixed | Mixed | ||||||||||||||||||||||||
| REAR SHOCK | RockShox Super Deluxe Base (205x60mm) |
RockShox Super Deluxe Ultimate (205x60mm) |
RockShox Vivid Select (205x60mm) |
RockShox Vivid Ultimate (205x60mm) |
RockShox Vivid Ultimate (205x60mm) |
RockShox Vivid Ultimate (205x60mm) |
||||||||||||||||||||||||
| FORK | RockShox Domain Gold RC (160mm) |
RockShox ZEB Ultimate (160mm) |
RockShox ZEB Select (160mm) |
RockShox ZEB Ultimate (160mm) |
||||||||||||||||||||||||||
| HEADSET | FSA NO.55R/57 | FSA NO.55R/57 | FSA NO.55R/57 | FSA NO.55R/57 | FSA NO.55R/57 (Included) |
FSA NO.55R/57 (Included) |
||||||||||||||||||||||||
| STEM | RaceFace Aeffect R (40mm) | Burgtec Enduro MK3 35 (35mm) | ANVL Swage (40mm) | ANVL Swage (40mm) | ||||||||||||||||||||||||||
| HANDLEBAR | RaceFace Chester 35 SM (780x20mm) MD/LG/XL (780x35mm) |
Burgtec Ride Wide Alloy Enduro SM (780x20mm) MD (780x30mm) LG/XL (800x38mm) |
ANVL Mandrel Alloy 35 SM (800x20mm) MD (800x30mm) LG/XL (800x40mm) |
ANVL Mandrel Alloy 35 SM (800x20mm) MD (800x30mm) LG/XL (800x40mm) |
||||||||||||||||||||||||||
| GRIPS | ODI Longneck V2.1 Lock-On | ODI Longneck V2.1 Lock-On | ODI Elite Flow Lock-On | ODI Elite Flow Lock-On | ||||||||||||||||||||||||||
| SADDLE | SDG Bel Air 3 | SDG Bel Air 3 | SDG Bel Air 3 | SDG Bel Air 3 LUX | ||||||||||||||||||||||||||
| SEATPOST | SDG Tellis 31.6mm SM (150mm) MD (170mm) LG (200mm) XL (230mm) |
OneUp Dropper Post SM (150mm) MD (190mm) LG (210mm) XL (240mm) |
OneUp Dropper Post SM (150mm) MD (180mm) LG/XL (210mm) |
OneUp Dropper Post SM (150mm) MD (180mm) LG/XL (210mm) |
||||||||||||||||||||||||||
| BRAKES | SRAM Maven Base | SRAM Maven Bronze | SRAM Maven Bronze | SRAM Maven Silver | ||||||||||||||||||||||||||
| ROTORS | SRAM Centerline (200mm) | SRAM Centerline (200mm) | SRAM Centerline (200mm) | SRAM HS2 (200mm) | ||||||||||||||||||||||||||
| SHIFTER | SRAM Eagle 70 MMX | SRAM Eagle 90 MMX | SRAM GX Eagle | SRAM POD Bridge MMX | ||||||||||||||||||||||||||
| DERAILLEUR | SRAM Eagle 70 | SRAM Eagle 90 | SRAM GX Eagle | SRAM GX AXS Eagle Transmission | ||||||||||||||||||||||||||
| CASSETTE | SRAM XS 1270 (10-52t) | SRAM XS 1275 (10-52t) | SRAM XG 1275 (10-52t) | SRAM XS 1275 T-Type (10-52t) | ||||||||||||||||||||||||||
| CHAIN | SRAM Eagle 70 | SRAM GX Eagle Transmission | SRAM GX Eagle | SRAM GX Eagle Transmission | ||||||||||||||||||||||||||
| CRANK | SRAM Eagle 70 DUB (32t/165mm) |
SRAM Eagle 90 DUB (32t/165mm) |
SRAM GX Alloy DUB (32t/165mm) |
SRAM GX Eagle DUB T-Type (32t/165mm) |
||||||||||||||||||||||||||
| CHAINGUIDE | e13 Vario Chainguide - Enduro | e13 Vario Chainguide - Enduro | OneUp Bash Guide | OneUp Bash Guide | ||||||||||||||||||||||||||
| RIMS | WTB ST i30 | DT Swiss E 1900 Spline 30 | RaceFace Aeffect R or DT Swiss 1900 Spline 30 |
RaceFace Aeffect R or DT Swiss 1900 Spline 30 |
||||||||||||||||||||||||||
| SPOKES | Pillar Double Butted | DT Swiss Champion | RaceFace 2.0/1.7/2.0 or DT Swiss Champion |
RaceFace 2.0/1.7/2.0 or DT Swiss Champion |
||||||||||||||||||||||||||
| HUBS | Novatech D791SB/D902SB | DT Swiss 370 Ratchet LN | RaceFace Trace 28H or DT Swiss 370 Ratchet LN |
RaceFace Trace 28H or DT Swiss 370 Ratchet LN |
||||||||||||||||||||||||||
| TIRE/FRONT | Maxxis Assegai 3C EXO/TR (2.5) | Schwalbe Magic Mary Super Trail, Soft (2.4) |
Schwalbe Magic Mary Super Trail, Soft (2.4) |
Schwalbe Magic Mary Super Trail, Soft (2.4) |
||||||||||||||||||||||||||
| TIRE/REAR | Maxxis Minion DHRII 3C EXO/TR (2.4) | Schwalbe Big Betty Super Trail, Soft (2.4) |
Schwalbe Big Betty Super Trail, Soft (2.4) |
Schwalbe Big Betty Super Trail, Soft (2.4) |
||||||||||||||||||||||||||
| INCLUDED | Tubeless Valves & Sealant | Tubeless Valves & Sealant | Tubeless Valves & Sealant | SRAM AXS Battery Charger Tubeless Valves & Sealant |
||||||||||||||||||||||||||
| COLOR OPTIONS |
|
|
|
|
|
|
||||||||||||||||||||||||
| WEIGHT | 36.6 lbs/16.60 kg (Size MD) | 33.1 lbs / 14.97 kg (Size MD) | 10.2 lbs / 4.63 kg (Size MD w/ Shock) | |||||||||||||||||||||||||||
| Specs are subject to change at any time. All complete bikes are 95% assembled and packaged for quick and easy final assembly, and as such, Transition Bikes is not able to make special request build spec changes or modifications to packaging. | ||||||||||||||||||||||||||||||

 |
|
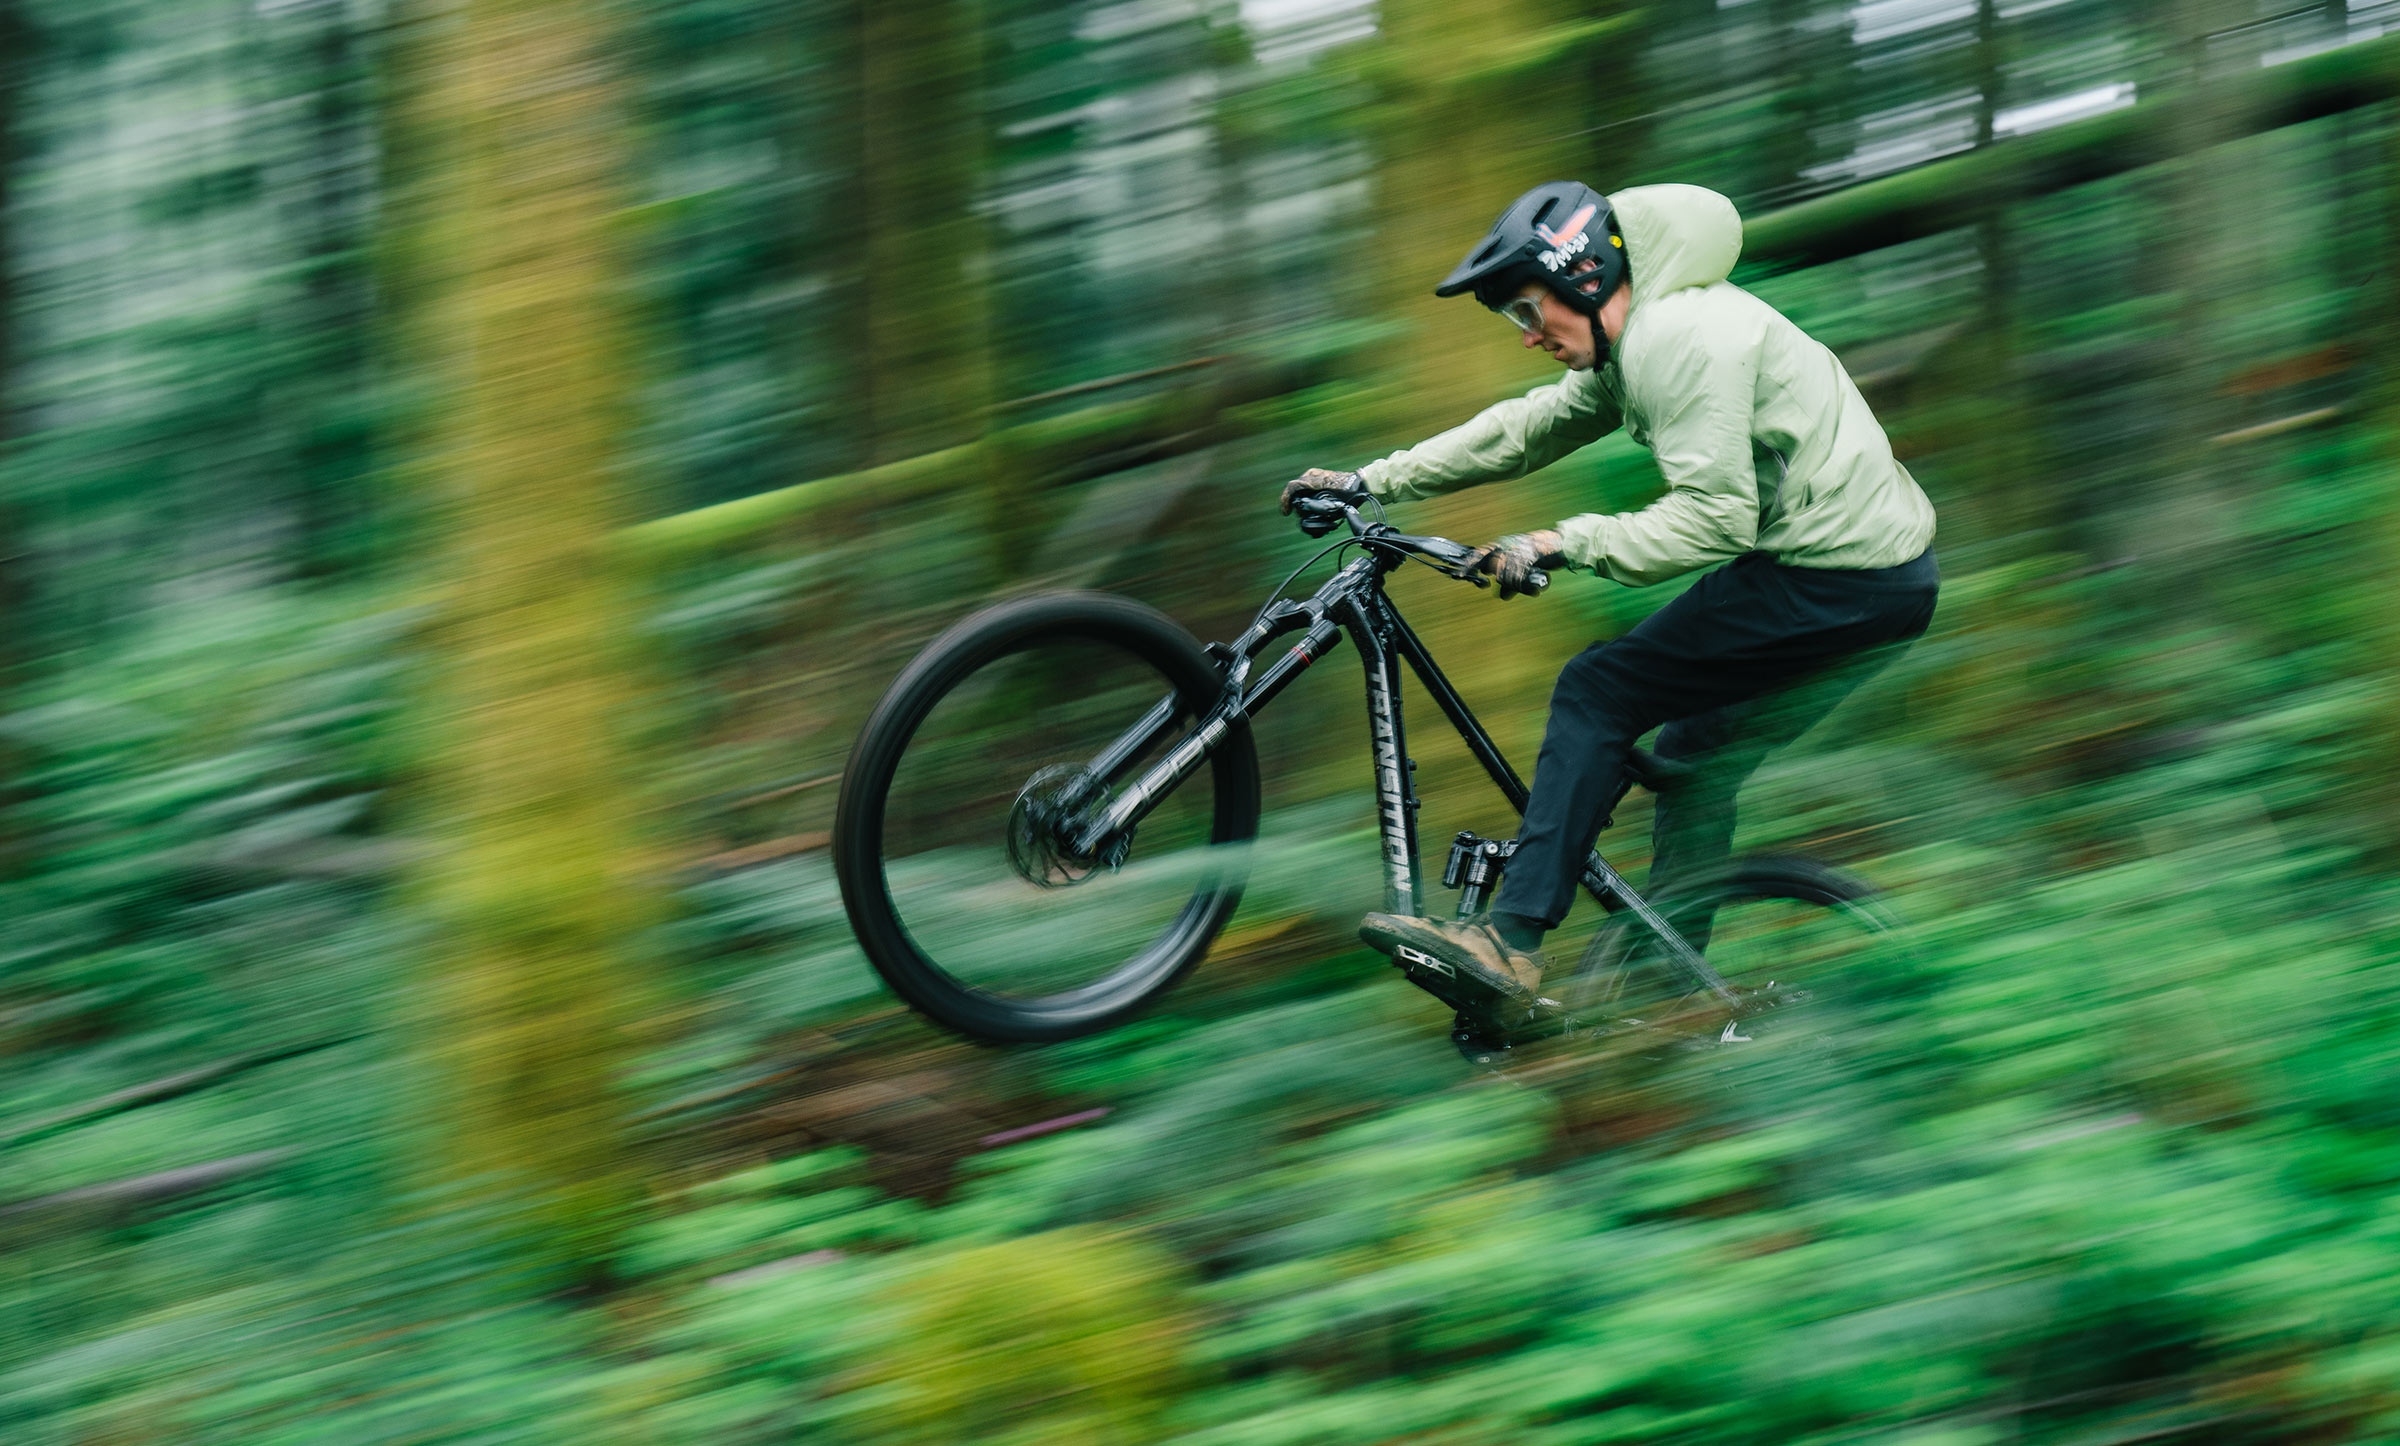
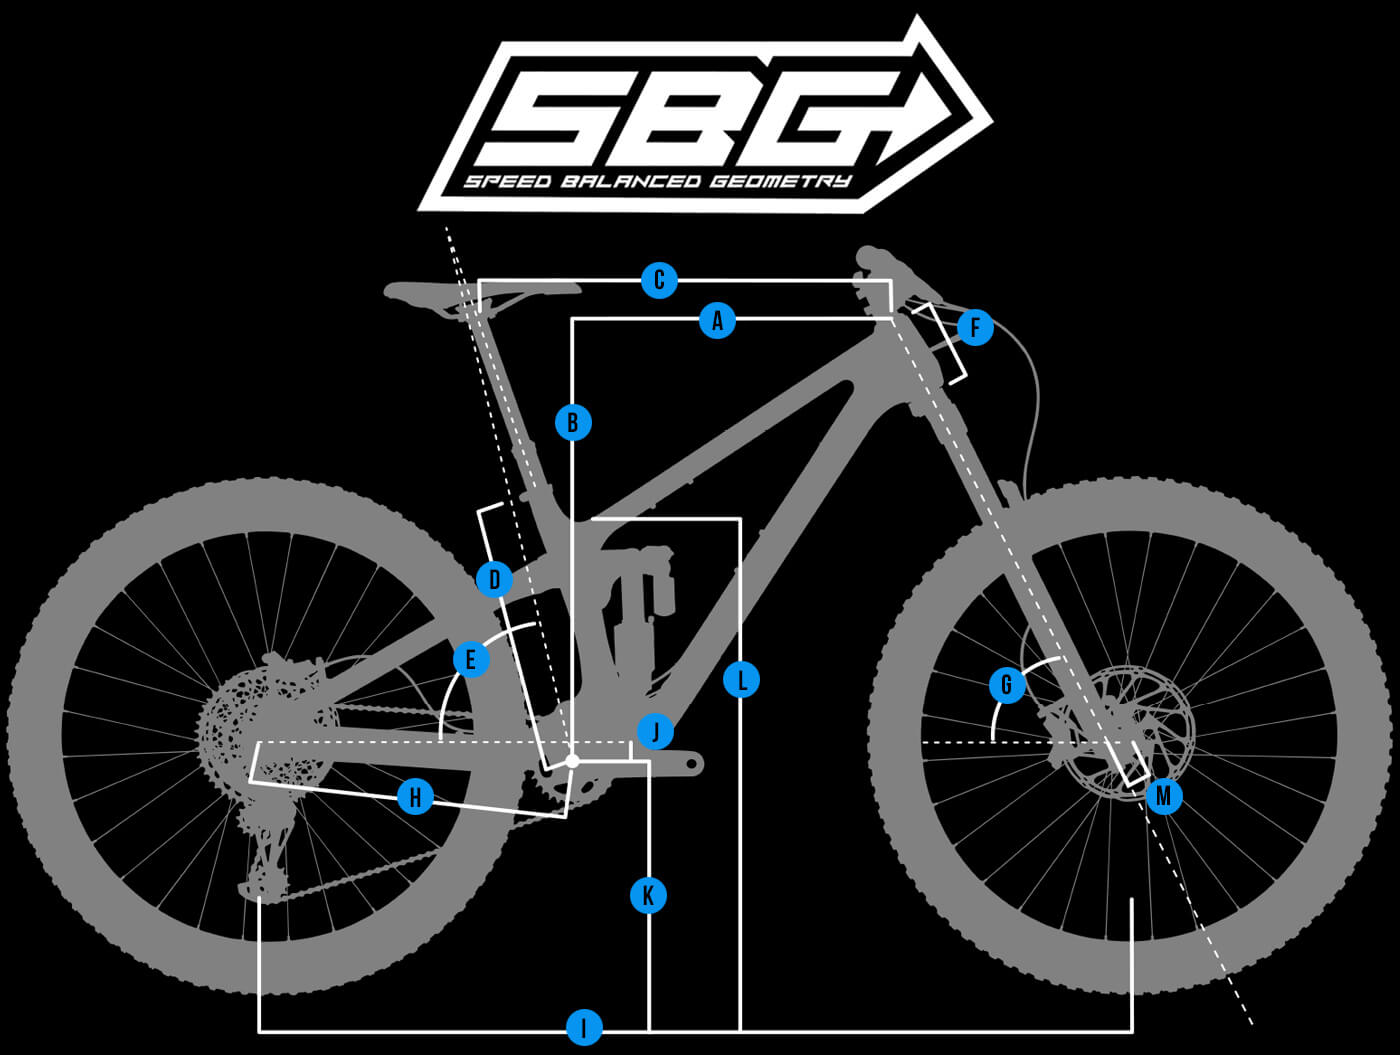
Speed Balanced Geometry SBG ensures the bike maintains low speed agility, front wheel traction, and proper rider weight balance while actually increasing confidence in steep terrain and at high speeds. With SBG, a slacker head tube angle is combined with a reduced offset fork standard, preventing the front wheel from being too far in front of the rider. This improves front to rear weight distribution on the bike, which is often out of balance on long and slack bikes. One of SBG's greatest benefits is that it creates a confident steering feel that adapts to wheel speed. More stability when going fast, more agility on technical slow speed maneuvering as well as improved traction, control and confidence for any skill level of rider. |
|||||||
| SM | MD | LG | XL | ||||
| High | Low | High | Low | High | Low | High | Low | ||||
| Fits Rider Heights | 5'0" - 5'7" | 5'6" - 5'11" | 5'9" - 6'3" | 6'1" - 6'7" | |||
| A.REACH | 420 | 415 | 455 | 450 | 480 | 475 | 510 | 505 | |||
| B.STACK | 623 | 628 | 623 | 628 | 632 | 637 | 641 | 646 | |||
| C.EFFECTIVE TOPTUBE LENGTH | 540 | 543 | 575 | 578 | 603 | 606 | 636 | 639 | |||
| D.SEATTUBE LENGTH | 360 | 390 | 430 | 460 | |||
| E.EFFECTIVE SEATTUBE ANGLE | 79.6 | 79.1 | 78.8 | 78.3 | 78.1 | 77.6 | 77.5 | 77 | |||
| SADDLE HEIGHT FOR EFFECTIVE SEATTUBE ANGLE | 600 | 660 | 720 | 780 | |||
| ACTUAL SEATTUBE ANGLE | 70.5 | 70 | 70.5 | 70 | 70.5 | 70 | 70.5 | 70 | |||
| SEATTUBE OFFSET AT BOTTOM BRACKET | 100 | 100 | 100 | 100 | |||
| F.HEADTUBE LENGTH | 100 | 100 | 110 | 120 | |||
| G.HEADTUBE ANGLE | 63.5 | 63 | 63.5 | 63 | 63.5 | 63 | 63.5 | 63 | |||
| H.CHAINSTAY LENGTH | 434 | 436 | 434 | 436 | 440 | 442 | 440 | 442 | |||
| I.WHEELBASE | 1196 | 1198 | 1231 | 1233 | 1266 | 1268 | 1301 | 1303 | |||
| J.BOTTOM BRACKET DROP (FRONT) | 35 | 42 | 35 | 42 | 35 | 42 | 35 | 42 | |||
| J.BOTTOM BRACKET DROP (REAR) | 15 | 22 | 15 | 22 | 15 | 22 | 15 | 22 | |||
| K.ESTIMATED BOTTOM BRACKET HEIGHT | 340 | 333 | 340 | 333 | 340 | 333 | 340 | 333 | |||
| STANDOVER HEIGHT | 675 | 685 | 690 | 700 | 705 | 715 | 720 | 730 | |||
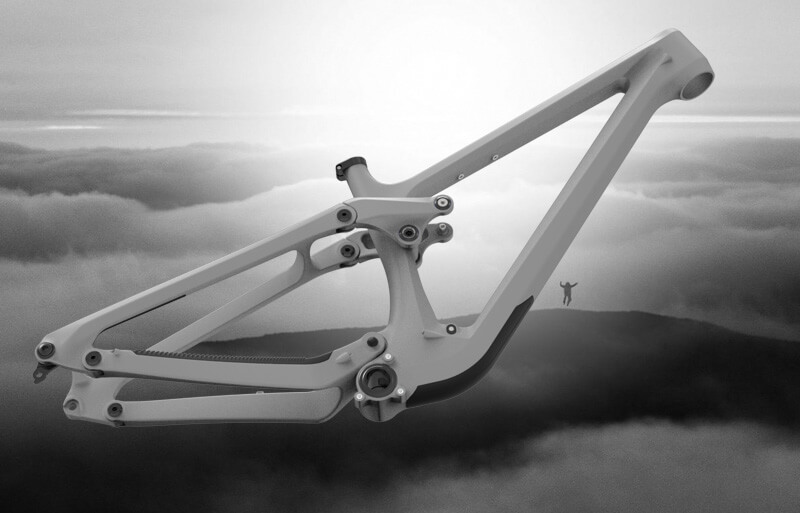
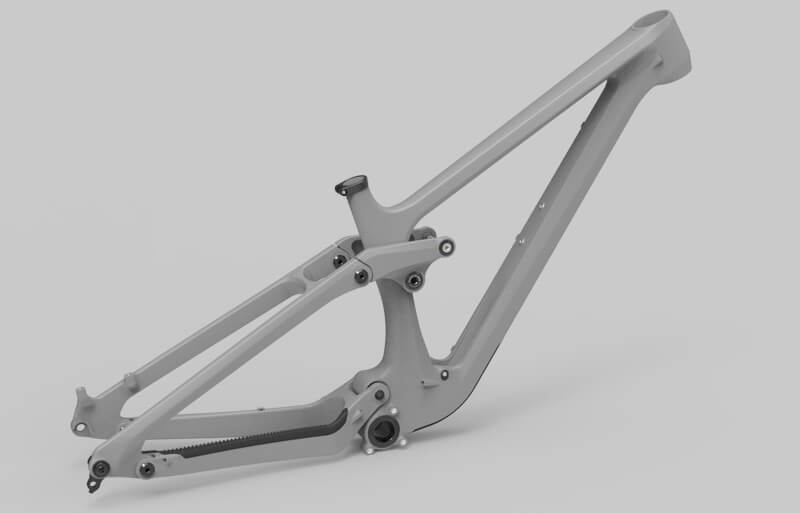
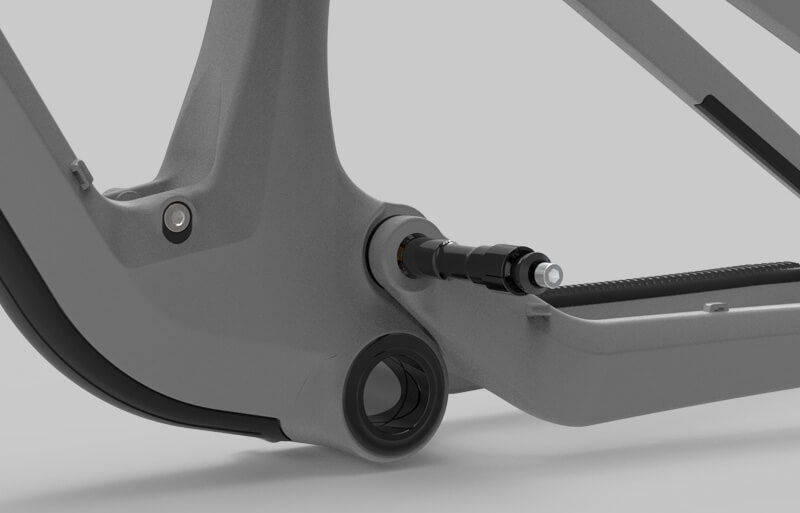
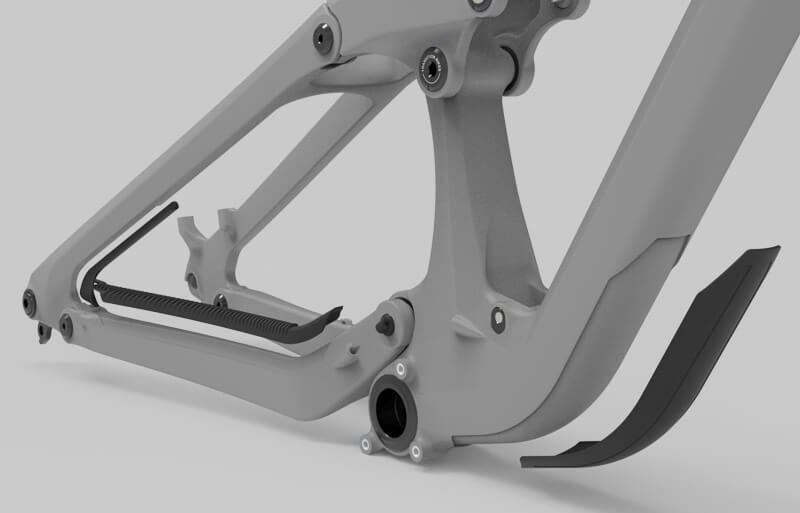
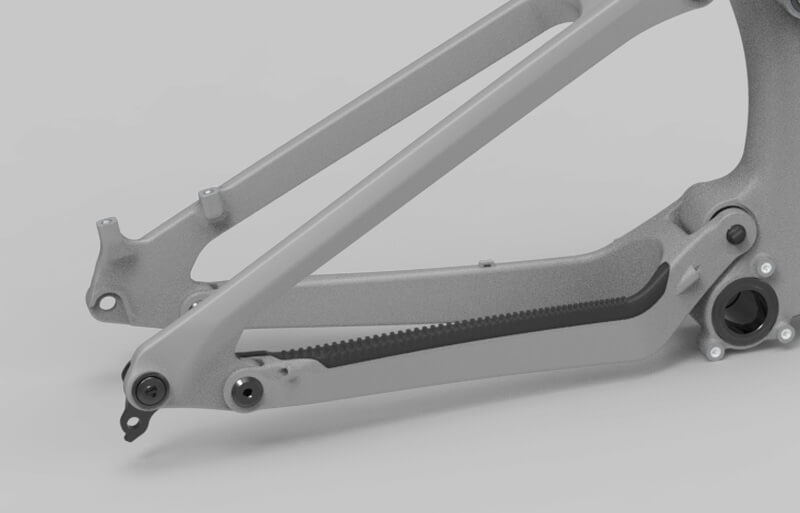
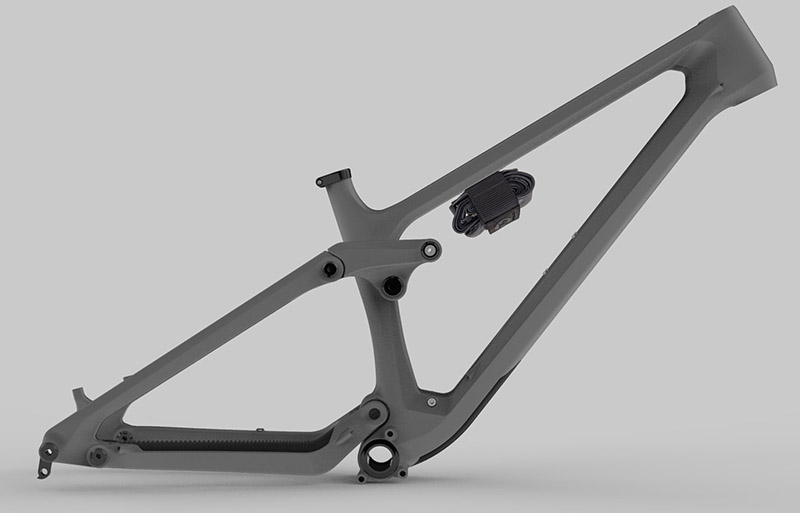
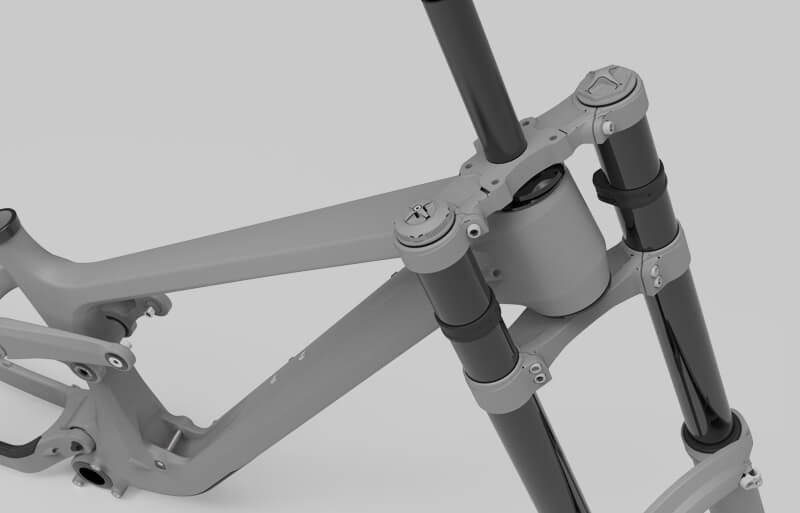
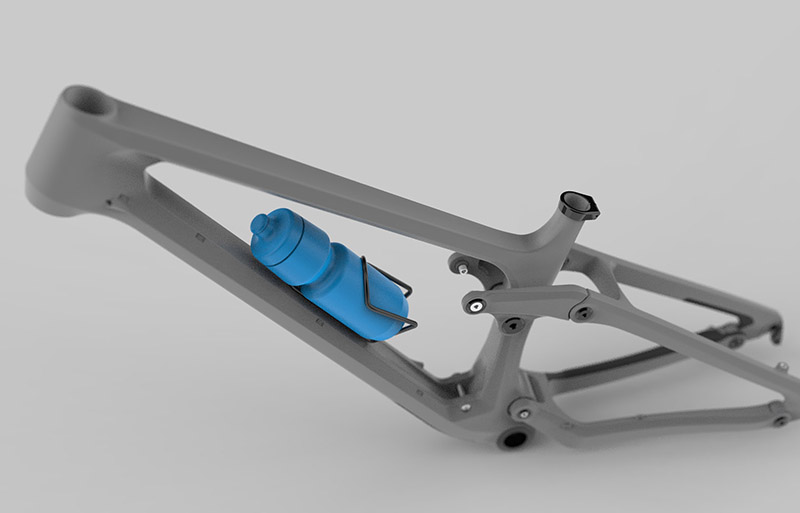
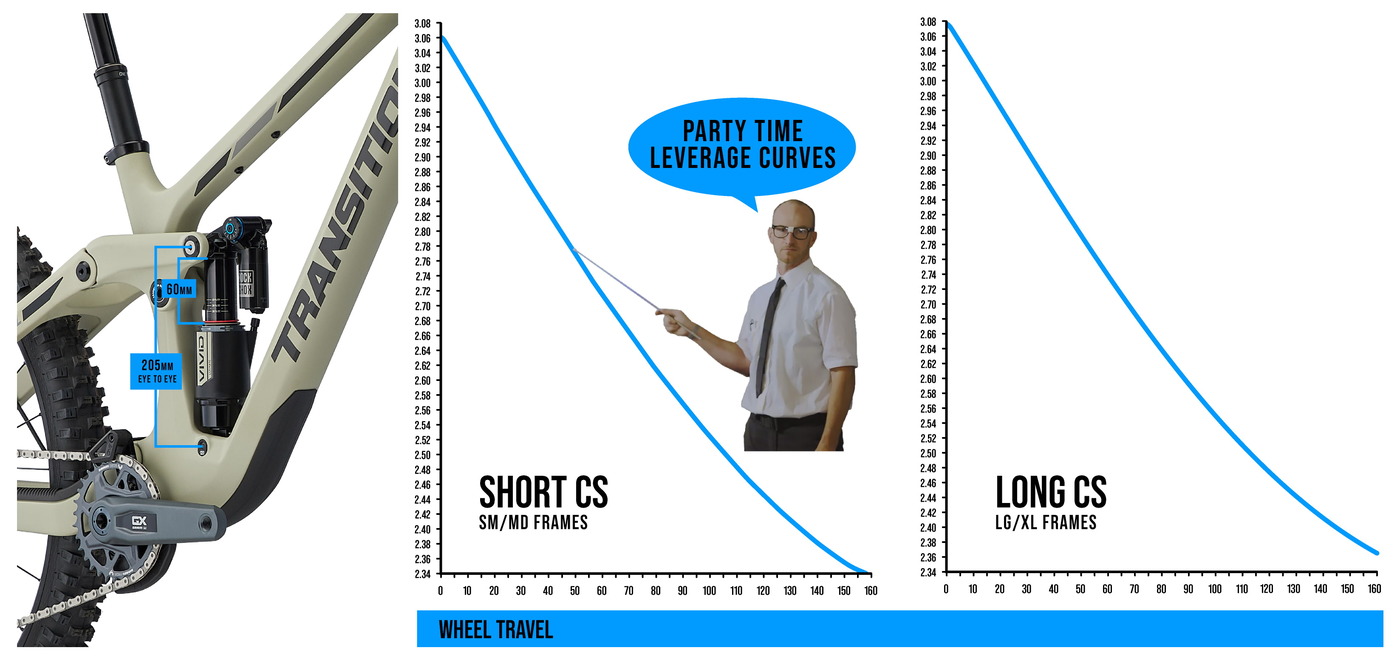
 GIDDYUP SUSPENSION DESIGN We want to make it as easy as possible to experience great rear suspension performance. The GiddyUp suspension system is designed to behave intuitively across a broad range of setup. Because, we get it, sometimes you just want to grab your bike and GiddyUp, without checking your setup. When you do, it will always feel good. 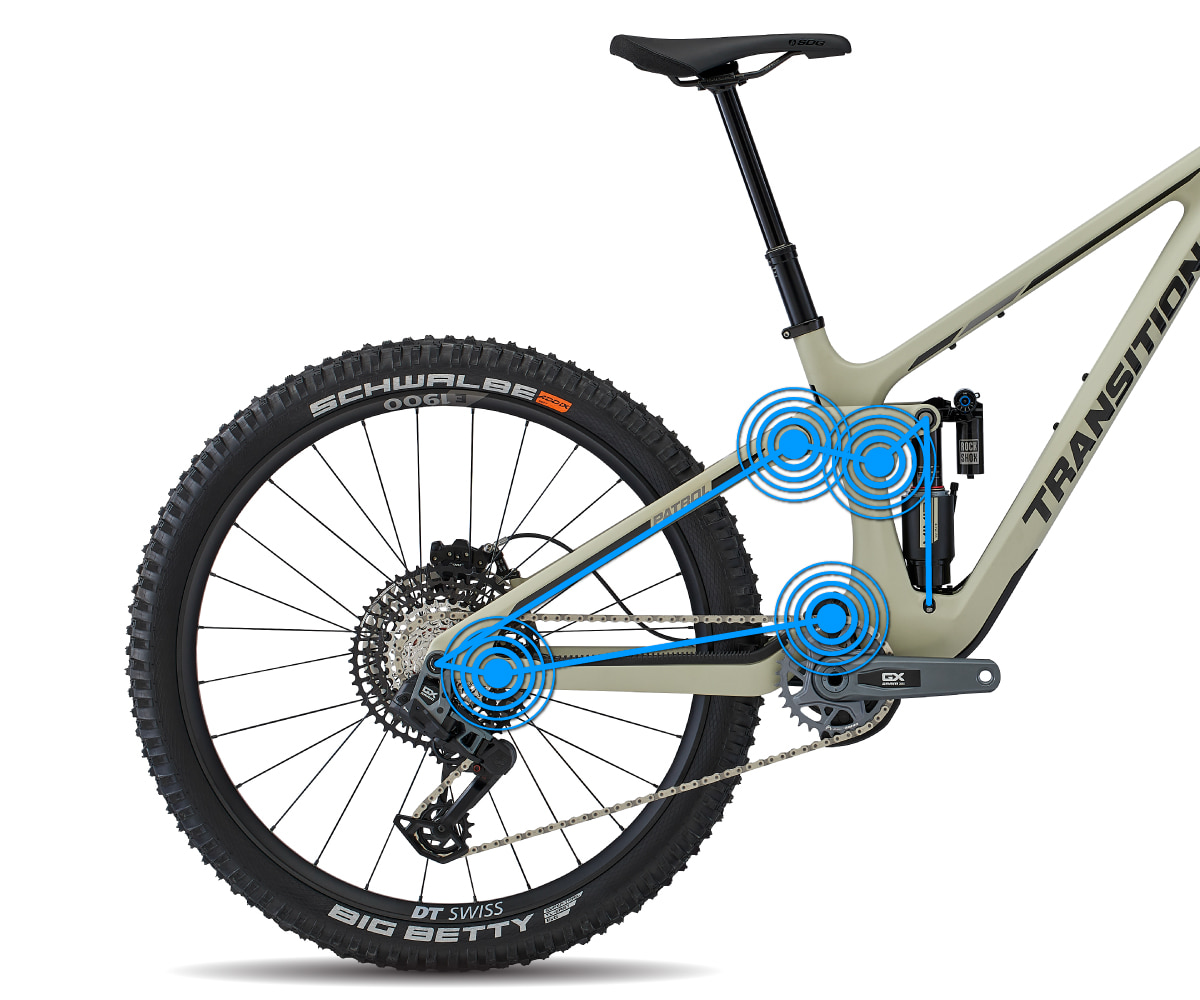 With nearly 24% progression and the most current evolution of our GiddyUp suspension kinematic, the Patrol has an excellent balance of support and small bump sensitivity. Anti-squat is tuned to enhance pedaling performance and provides a platform to push against when pumping, without sacrificing a bottomless feel when needed.
The GiddyUp suspension layout is tuned to work correctly with both air and coil rear shocks. Riders are able to add or remove volume spacers in the rear air shock to suit their individual riding style and there is plenty of bottom out control with air or coil shocks when things get rowdy. The Patrol has 160mm of rear wheel travel when used with the supplied 205mm x 60mm stroke shock. It is also possible to install a longer, 205mm x 65mm stroke shock to increase the rear wheel travel to 170mm if you are after a longer travel experience. A suggested sag range of 27 - 33% allows the rider to tune the feel of the bike; from a firm and snappy jump and slash mode, to a more supple and active full on party mode. Wherever you end up, you can focus on the trail without remotes, levers or knobs. Just grab your bike and GiddyUp. | |||
|

| REAR TRAVEL: | 160mm (Compatible with 170mm) | ||
| FRONT TRAVEL: | 160mm (Compatible with 170mm single crown fork or dual crown forks) | ||
| WHEEL SIZE: | 29" Front / 27.5" Rear | ||
| SIZES: | SM, MD, LG, XL | ||
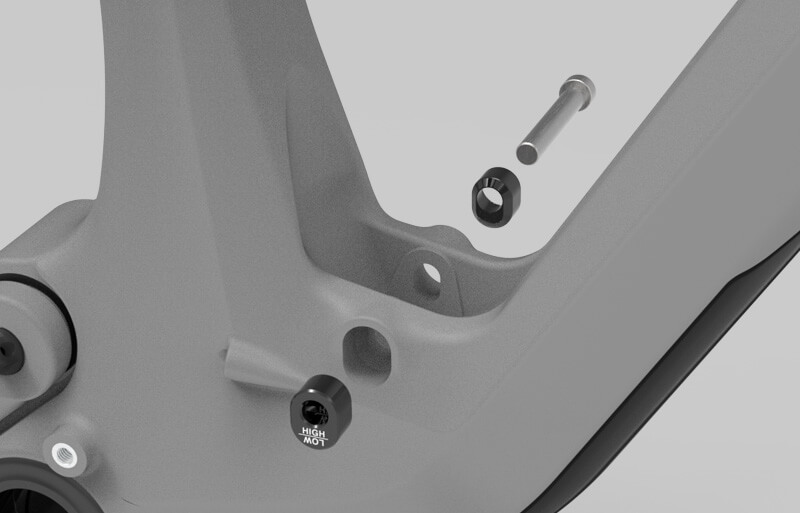
| FRAME BEARINGS: | 2x 6903, 2x 6902, 4x 6802, 2x 3802, 2x 6900 | ||
| FORK AXLE TO CROWN: | 574mm at 160mm | ||
| FORK OFFSET: | 44mm | ||
| REAR SHOCK SIZE: | 205mm x 60mm (Compatible with 205mm x 65mm) | ||
| SHOCK HARDWARE: | Trunnion Mount Top / 30mm x 8mm Bottom | ||
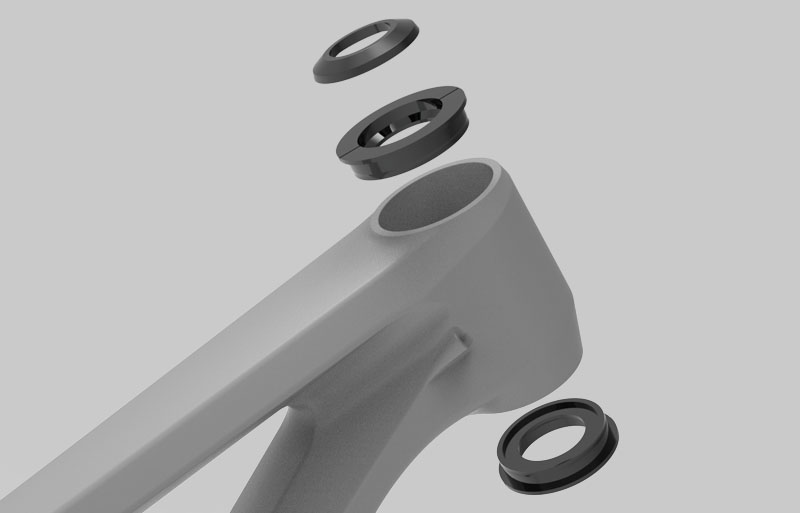
| HEADSET (TOP): | 56mm Zero Stack | ||
| HEADSET (BOTTOM): | 56mm Zero Stack | ||
| BB SHELL: | 73mm BSA Threaded | ||
| CHAINLINE: | 52mm | ||
| REAR BRAKE MOUNT: | 180mm Post Mount, Max Rotor Size 223mm | ||
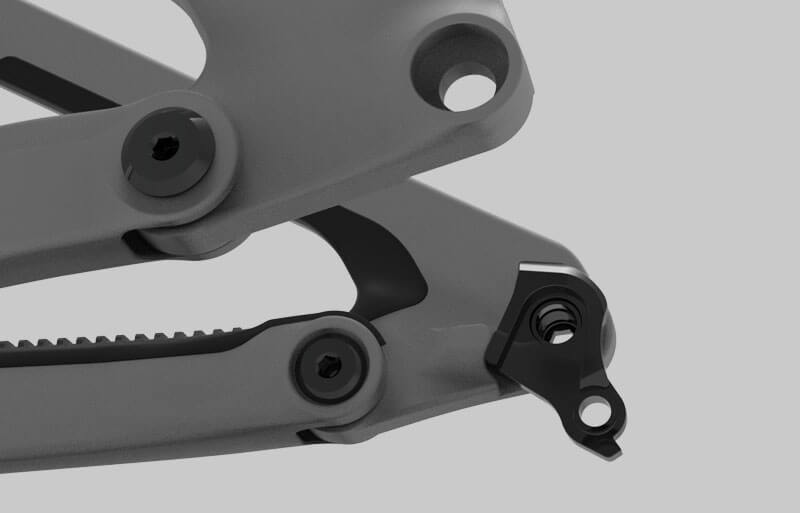
| DERAILLEUR HANGER: | SRAM UDH | ||
| REAR AXLE: | Transition Axle For UDH, 12mm x 148mm Spacing | ||
| ISCG TABS: | ISCG05 | ||
| SEATPOST DIAMETER: | 31.6mm | ||
| SEAT CLAMP: | Carbon: 37.0mm | ||
| MAX SEATPOST | Carbon: Small 220mm | Medium 250mm | Large 290mm | XL 320mm | ||
| MAX CHAINRING SIZE: | 34T Standard Single Ring (Based on 52mm Boost Chainline) | ||
| MAX TIRE SIZE: | 27.5 x 2.6 (*see FAQ) | ||
| REAR SHOCK SAG: | 160mm/60mm: 16-20mm (27-33%) 170mm/65mm: 18-22mm (28-34%) | ||
|
|
|||||||||||||||||||||||||||||||||||||||||||||||||||||||||||||||||||||||||||||||||||||||||||||||||||